Rancher - Configure Local Access Control
After a fresh Rancher installation, there is no authentication in place, meaning your system is wide-open for anyone to abuse. This tutorial will show you how to set up the most basic/easiest authentication system with just setting up a local username and password.
Steps
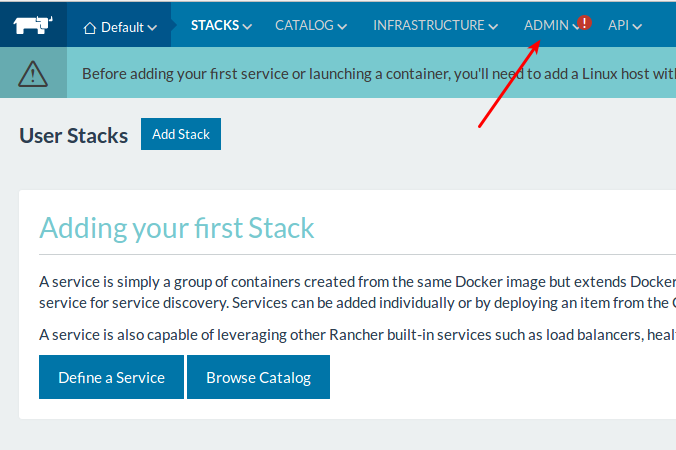
Click on Admin in the navigation bar. It has a red exclamation mark because there is no authentication system in place.
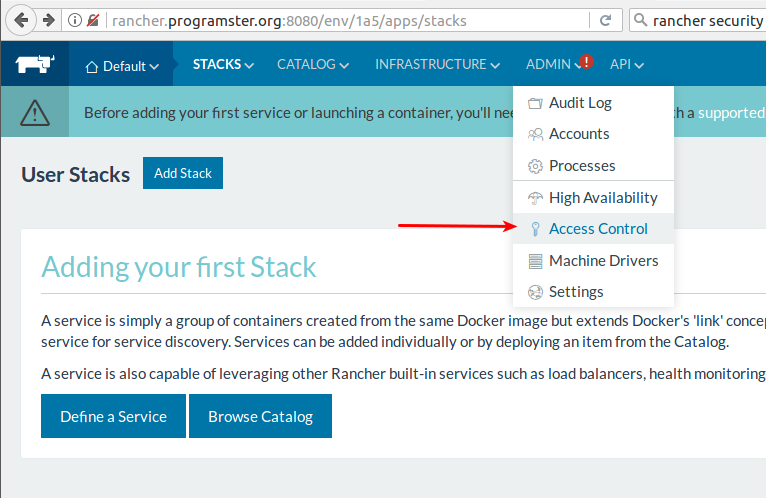
Click on Access Control.
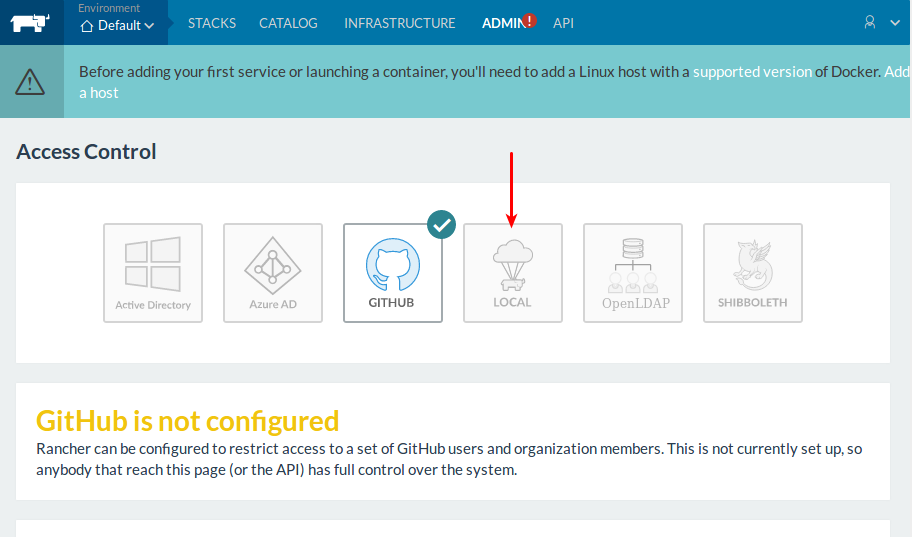
By default, Github will be selected. Click on the greyed-out Local option.
Fill in your desired username and password before then clicking on Enable Local Auth.

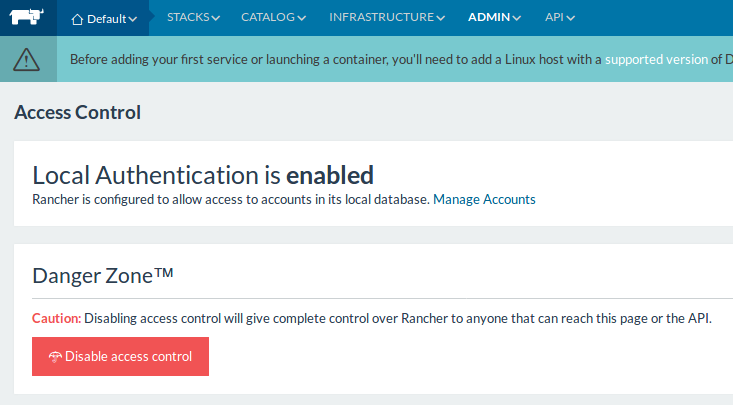
That's It! You should now be taken back to the Access Control page which tells you that Local authentication is enabled.
You can add other accounts by clicking on Manage Accounts if you wish.
You can also disable this access control system by clicking on Disable Access Control. This will allow you to set up a different authentication system should you wish.
Testing
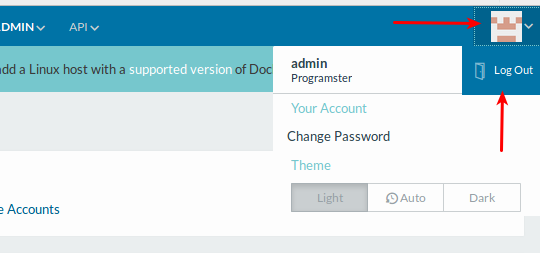
If you want to test that the authentication system works, you can log out by clicking the icon in the top right and then clicking Log Out.
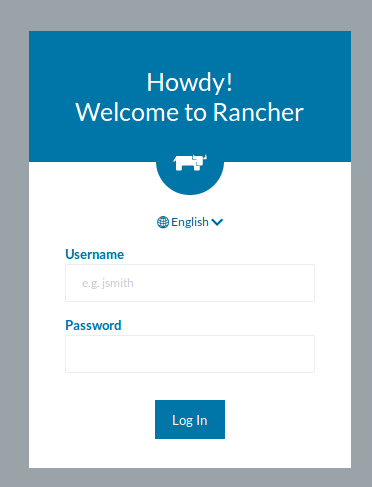
Now when you go back to rancher, you will be presented with the login screen as shown below:
Conclusion
You now have authentication in place. Now it's time to add your first host.
First published: 16th August 2018