Debian 11 - Install Pritunl
The following tutorial will show you how to install Pritunl on Debian 11. Pritunl is a service that wraps around Wireguard and OpenVPN, allowing you to easily create and manage VPN tunnels, through a web UI GUI.
Requirements
- If you are going to install everything on one VPS (e.g. includes the MongoDB database, then you will need 1GB of RAM. If you are using an external MongoDB database, then you can get away with just 512MB of RAM.
- 1 vCPU
- External Firewall (see security section)
Related Posts
Steps
Install MongoDB
Pritunl requires a MongoDB database. It is probably going to be easiest to install this locally by following my tutorial on how to install MongoDB on Debian 11.
Install Pritunl
Once you have finished setting up MongoDB, install Pritunl by running:
sudo apt update && sudo apt install -y apt-transport-https \
  && sudo echo "deb https://repo.pritunl.com/stable/apt bullseye main" | sudo tee /etc/apt/sources.list.d/pritunl.list \
  && sudo apt-key adv --keyserver hkp://keyserver.ubuntu.com --recv 7568D9BB55FF9E5287D586017AE645C0CF8E292A \
  && sudo apt update \
  && sudo apt install -y wireguard pritunl
Now start Pritunl, and have the service start on boot.
sudo systemctl enable pritunl \
  && sudo systemctl start pritunl
Security
The Pritunl docs explicitly state that one needs to use an external firewall, rather than one on the host through something like firewalld, iptables, or UFW. This is because Pritunl will modify iptables rules on the server and these firewalls will break the Pritunl configuration. Thus, even though MongoDB doesn't require authentication by default, we can use the external firewall to block external access to all ports except the ones we whitelist below. This will prevent people from outside the server from connecting to MongoDB on it's port (27017) to and editing the data in the Mongo database.
AWS, DigitalOcean, Vultr, and Proxmox all provide free external firewalls.
The key thing is to default deny, and then to whitelist the following ports:
- 22 (TCP) - SSH - feel free to change this if you use a custom port for SSH for extra security.
- 80 (TCP) - HTTP traffic
- 443 (TCP) - HTTPS traffic
- 943 (TCP) - OpenVPN Port
- 1194 (UDP) - OpenVPN Port
Finally, you will need to open up the custom UDP port of the server that you configure in Wireguard later during the configuration steps.
Checking Firewall
To check that your firewall is set up correctly, you can use nmap to check if the ports are open/closed on the host. E.g.
sudo nmap -sS -O -p80,443,27017 xxx.xxx.xxx.xxx/32
That should provide output similar to below:
PORT      STATE  SERVICE
80/tcp    open   http
443/tcp   open   https
27017/tcp closed mongod
Pritunl Configuration
Navigate to your server's IP address/hostname in your browser and you should see the following setup screen. You will likely need to accept a SSL certificate warning.
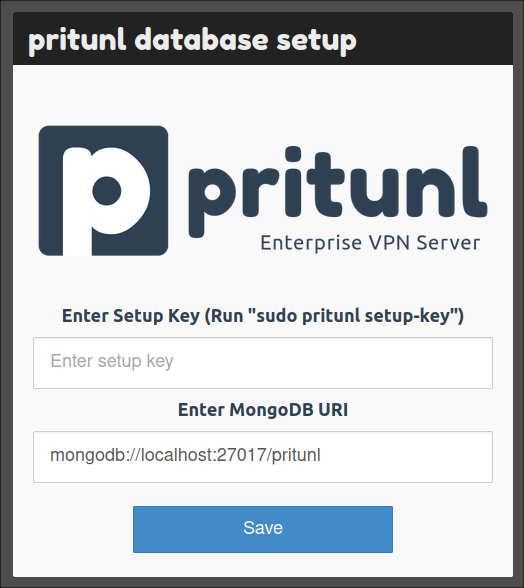
Run the command that it asks to you to run, from inside the server:
sudo pritunl setup-key
... before then pasting it into the form and hitting submit.
You will then see it perform some steps...

... before it then refreshes with a login form.
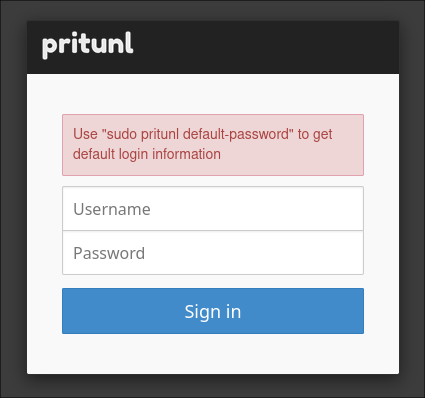
Run the command it tells you, in order to get the default login details:
sudo pritunl default-password
This will give you the username pritunl with a randomly generated alphanumeric password.
Feed those into the form and sign in.
You will then be prompted with the following form:
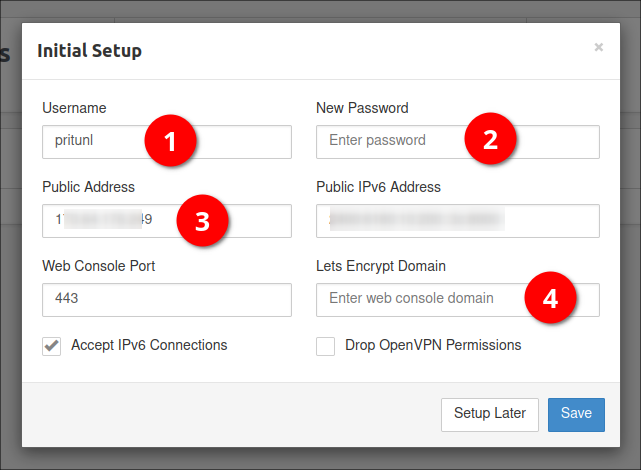
I would recommend changing the default username (1), and setting your own password (2). You can then either feed in your server's fully qualified domain name in the public address, or leave it as the IP address. I would recommend setting a DNS name though, as you can then also use this to automatically generate Let's Encrypt SSL certificates, if you provide it (4). I would not recommend dropping OpenVPN permissions, as OpenVPN is the primary purpose of Pritunl, unless you just wish to use it for Wireguard.
Add Organization
The first thing you need to do is create an organization. You will map users and servers to this.
Add Server
Now use the UI to create a server. During this process, it will give you a suggested port, that you can change if you like. Be sure to allow this port through your firewall.
Don't forget to start the server once you have created it!
Add Users
Add users to the service. Users will need to be mapped to an organization and a server.
Debugging
Web Interface Not Appearing
I recently had a strange issue whereby the web interface would never show up. In the end we uninstalled the iptables package:
sudo apt-get remove iptables
... and reinstalled pritunl (which re-installed iptables again) and it worked.
sudo apt install -y wireguard pritunl
You should be making use of an external web firewall anyway, so this should not be too much an issue.
Too Many Redirects
If you hit an issue whereby you receive a message from your browser that the site is not working, and that there were too many redirects, you may have misconfigured a reverse-proxy.
This can happen if you tell your proxy to terminate the SSL connection and forward on the connection to Pritunl on port 80. If you do this Pritunl thinks it is an unencrypted connection, and will send back a redirect telling your browser to go back on an https connection. This results in an infinite loop.
The solution is to update your reverse proxy/load-balancer to forward the connection onto Pritunl using https/443 instead.
Migrating to Debian 12
Unfortunately I have not been able to get Pritunl working on Debian 12 yet, but I thought it best to reference this post on how to migrate pritunl to another server for when I do. This way I should hopefully not have to re-setup users against the newer server, but gracefully transition.
References
First published: 9th January 2023