Deploy CloudBeaver Database Mangement Tool Using Docker
Introduction
CloudBeaver is a web-based database management tool (like phpMyAdmin, and pgAdmin), except that it supports connecting to multiple different database types, instead of just MySQL or PostgreSQL.
Docker Deploy
First we need to deploy the service using Docker Compose. I am going to assume you already have a server running Docker and supports Docker Compose.
If you just wish to run CloudBeaver on its own, you can quickly spin it up using the following example docker-compose.yaml file:
services:
    cloudbeaver:
    container_name: dbeaver
    image: dbeaver/cloudbeaver:25
    restart: unless-stopped
      ports:
       - "8978:8978"
    volumes:
      - cloudbeaver:/opt/cloudbeaver/workspace

volumes:
  cloudbeaver:
    driver: local
Once that is spun up with docker-compose up you should be able to connect to cloudbeaver by
going to the server's IP on port 8978 in your browser. Eg. http://127.0.0.1:8978 if using your local computer.
Reverse Proxying
If using a reverse proxy, you need to add the PROXY_TYPE environment variable like so:
services:
    cloudbeaver:
    container_name: dbeaver
    image: dbeaver/cloudbeaver:25
    restart: unless-stopped
      ports:
       - "8978:8978"
    volumes:
      - cloudbeaver:/opt/cloudbeaver/workspace
    environment:
      - PROXY_TYPE=nginx

volumes:
  cloudbeaver:
    driver: local
Traefik Version
If you are using a Traefik reverse proxy then y ou may wish to use something like the following (I have traefik connected on an external traefik-net Docker network).
version: "3.9"

networks:
  traefik-net:
    external: true

services:
    cloudbeaver:
    container_name: dbeaver
    image: dbeaver/cloudbeaver:23.2
    restart: unless-stopped
    networks:
      - traefik-net
    volumes:
      - cloudbeaver:/opt/cloudbeaver/workspace
    environment:
      - CB_SERVER_URL="${FQDN}"
    labels:
      - traefik.enable=true

      # Specify http routing
      - traefik.http.routers.dBeaverRedirect.entrypoints=web
      - traefik.http.routers.dBeaverRedirect.rule=Host("${FQDN}")
      - traefik.http.routers.dBeaverRedirect.tls=false

      # Add middleware to redirect http to https on port 443
      - traefik.http.middlewares.redirect-web-secure.redirectscheme.scheme=https
      - traefik.http.routers.dBeaverRedirect.middlewares=redirect-web-secure

      # Routing for https
      - traefik.http.routers.dBeaver.entrypoints=websecure
      - traefik.http.routers.dBeaver.rule=Host("${FQDN}")
      - traefik.http.services.dBeaver.loadbalancer.server.port=8978
      - traefik.http.routers.dBeaver.tls=true


volumes:
  cloudbeaver:
    driver: local
FQDN specified for your CloudBeaver URL. E.g. cloudbeaver.mydomain.com.
This is the fully qualified domain name that Traefik will expect incoming requests on, and redirect them to your cloudbeaver instance.
I found that I needed to set CB_SERVER_URL to match in order to get CloudBeaver to respond on that URL.
23.2 which I have hardcoded my Docker compose examples to.
You may wish to check if there is a later version that is available.
Web UI Setup
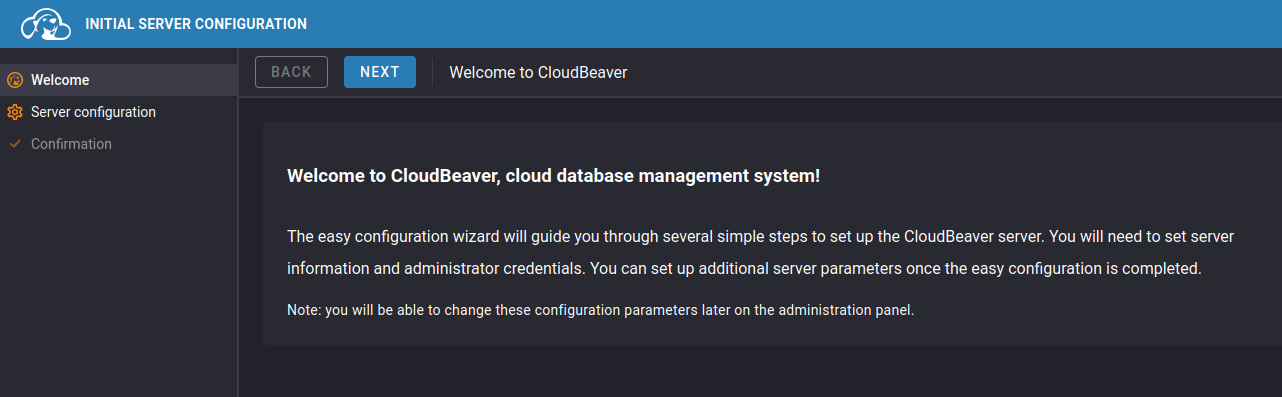
Now that you have deployed the CloudBeaver server, let's go access and configure it.
When you navigate to your CloudBeaver server in the browser for the first time, you will be greeted with the following message:
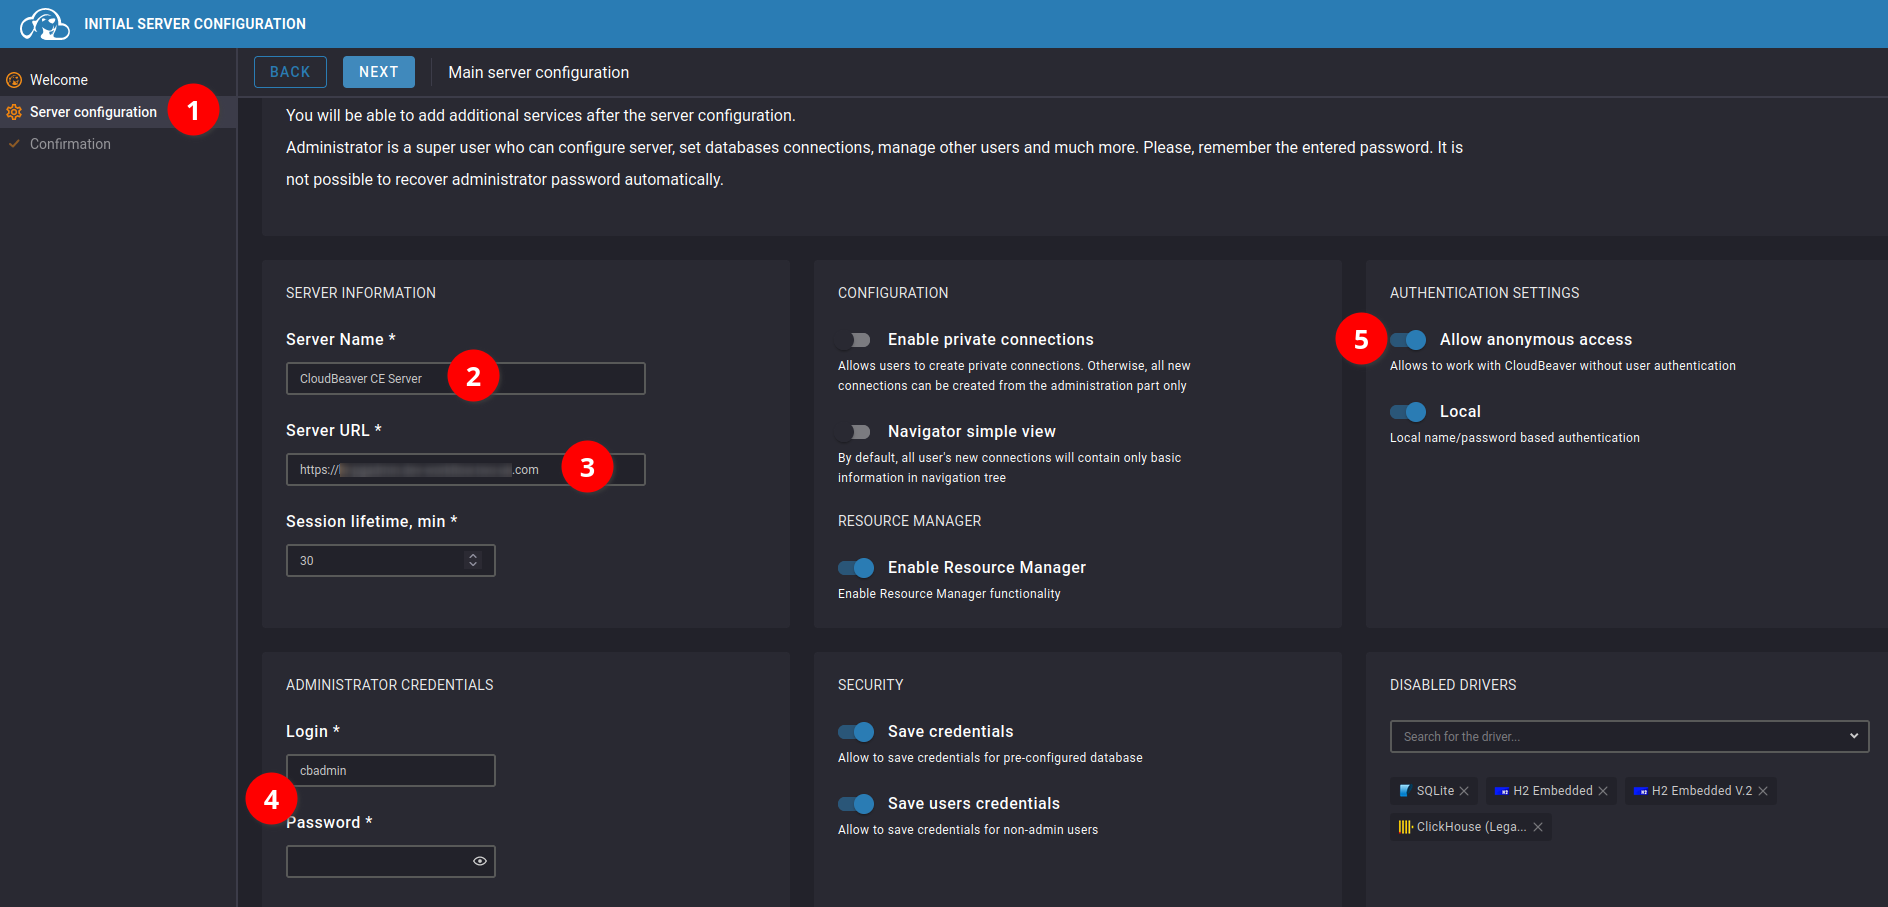
You will then proceed to the Server configuration page, where you can give your server a name (2), check the URL is correct (3),
specify the administrator login credentials (4), and I would recommend disabling anonymous access (5).
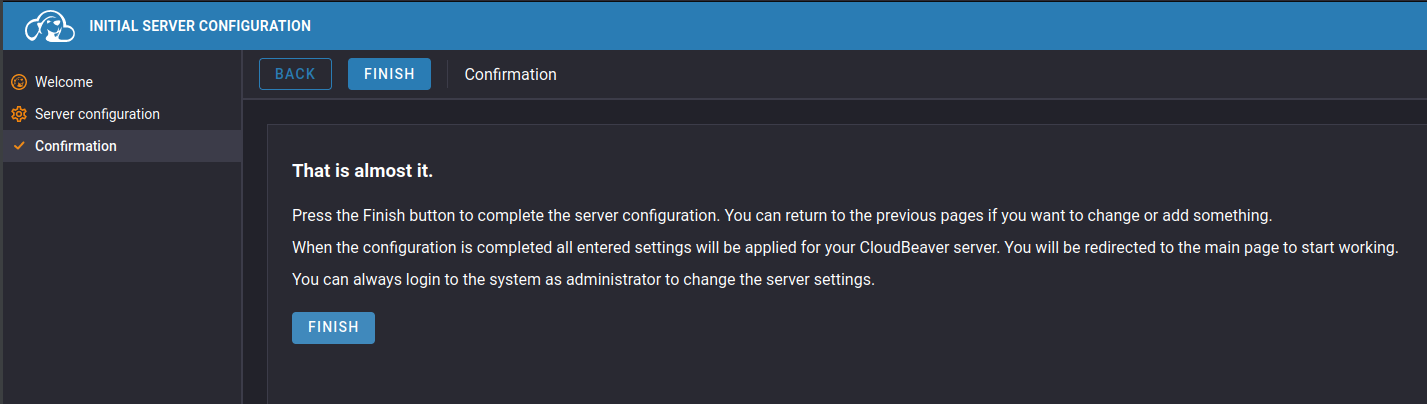
You will then be promped with the following screen. Just click Finish.
You will now be shown the login modal, in which you need to provide the authentication
details you just filled in earlier.

Create Database Connection
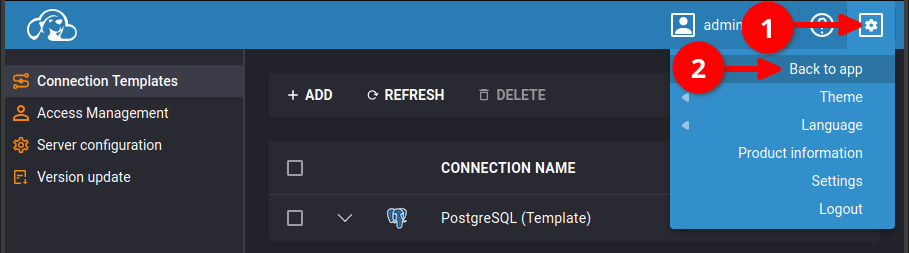
To create a fresh database connection, click on the cog in the top right corner (1),
before clicking Back to app (2).
Click on the plus symbol (1), and click on New Connection

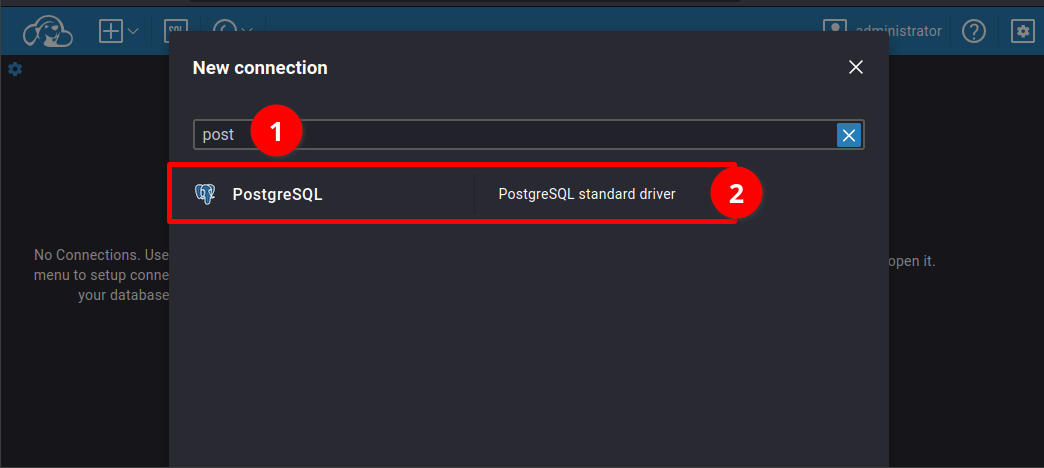
Type in the type of connection you want to create (1).
I wanted to connect to my Docker network's PostgreSQL database container, so I typed in post for PostgreSQL.
Then click on the driver that should appear (2).
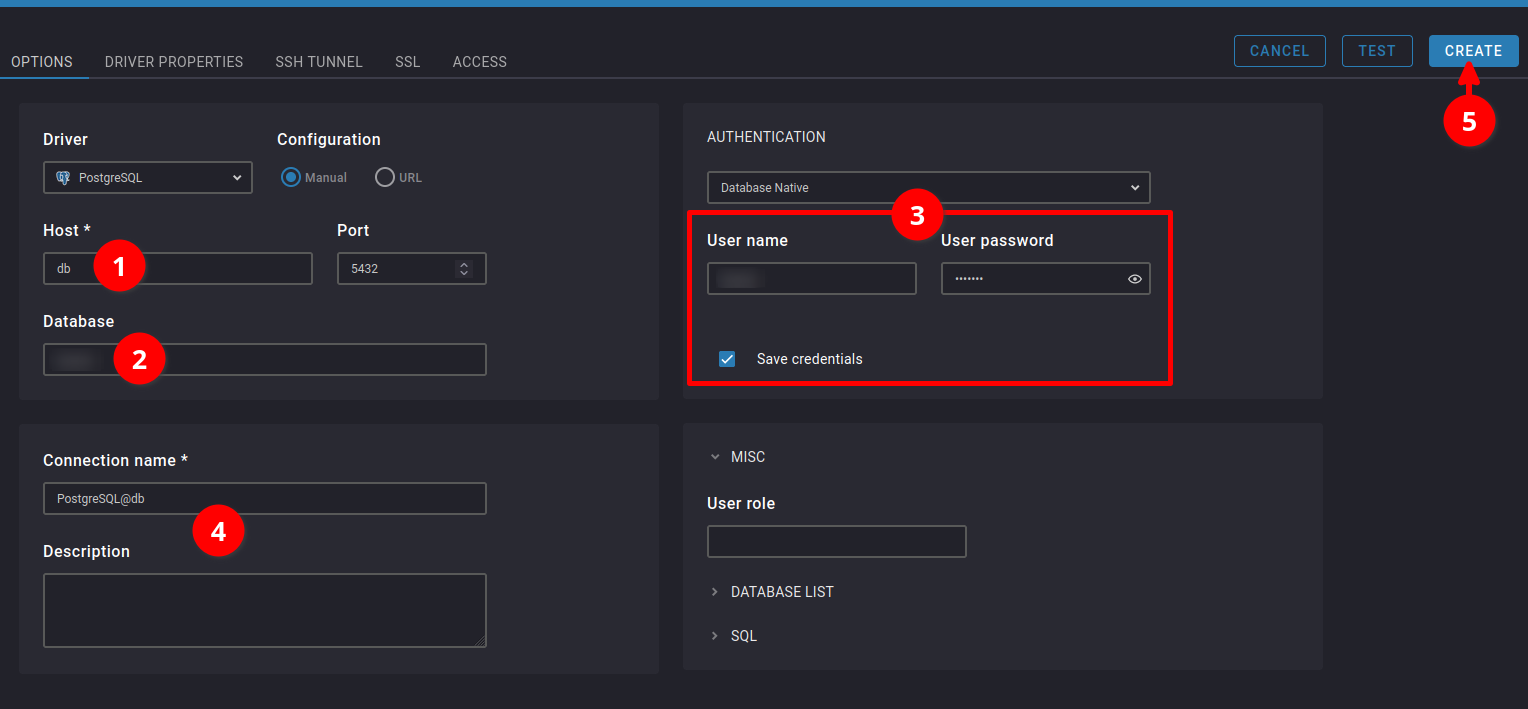
Fill in the host (1) (which for me was just db as that is what I named the database
container). Then specify the name of the database (2), and provide the
authentication details (3). You may wish to provide a name to remember this connection by (4). Then click Create (5)
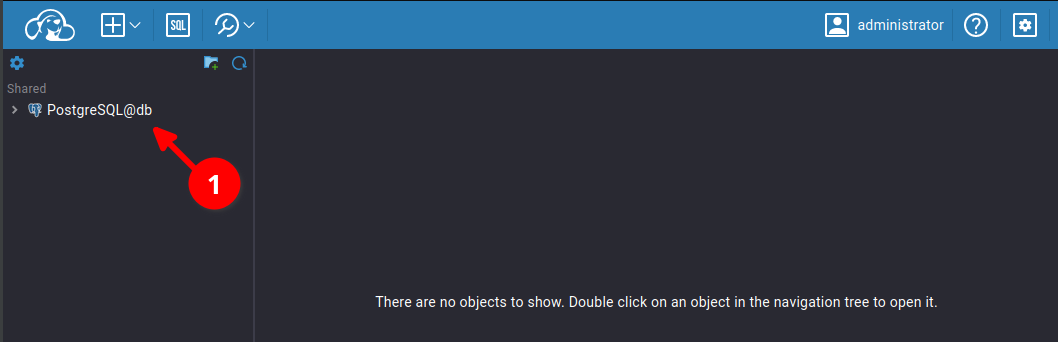
The connection you just created, with the Connection name you specified earlier
will now appear on the left-hand side.
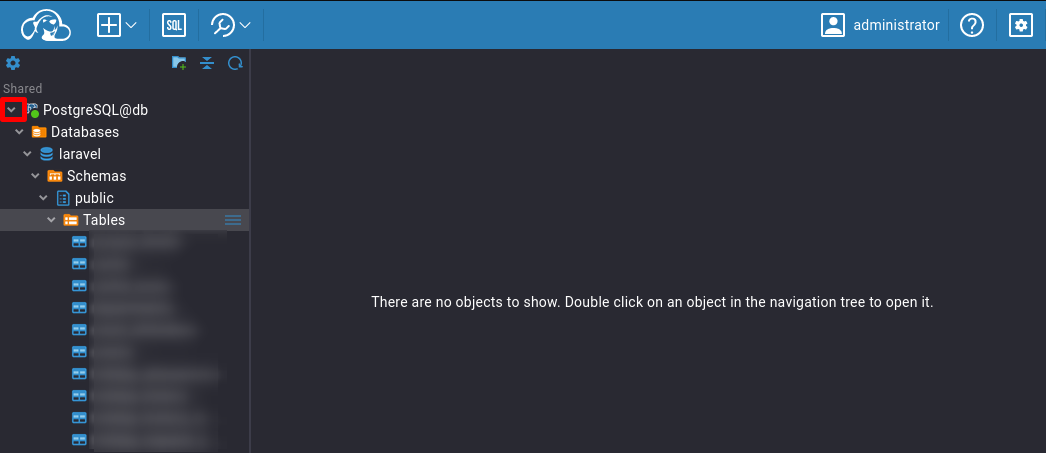
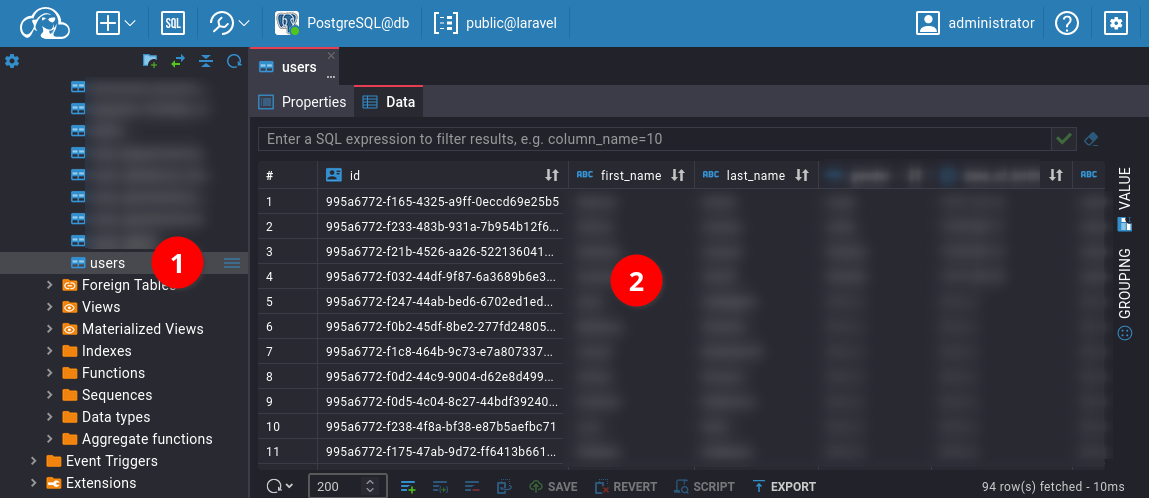
If you keep clicking the chevrons, you can dig down into the database and get to
the list of tables.
If you double click on a table, in this case the users table, the data within
that table will show up on the right (2), which you can view/edit in place if you like.
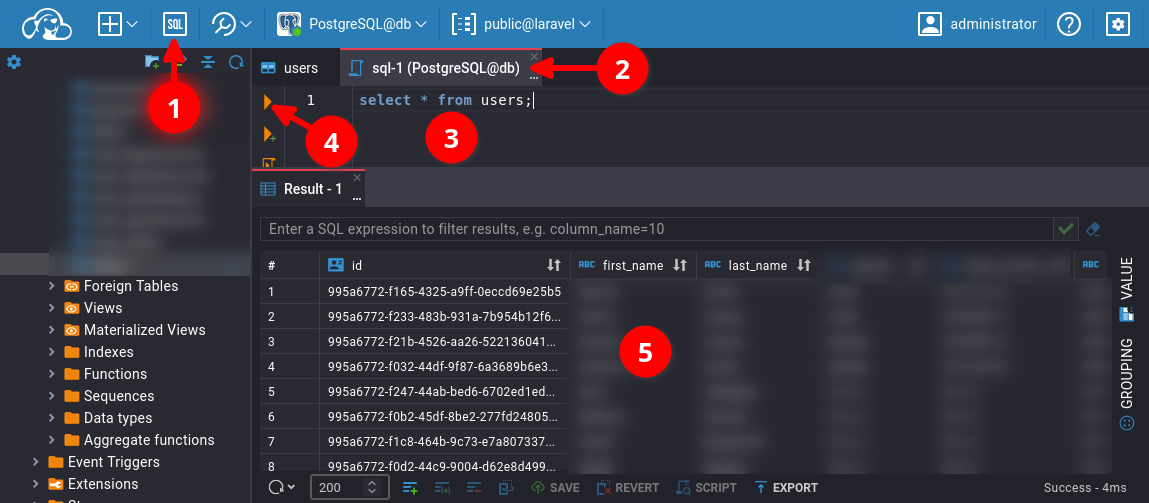
Finally, if you wish to run some SQL queries to select data or manipulate it, all
you need to do is click the SQL icon (1), which will create a new tab (2), in
which you can specify an SQL query (3), before pressing the play button to execute it (4).
The results of which will appear down below (5).
Conclusion
That's all for now to get you started. The tool is pretty intuitive, so I'm sure you will find the rest pretty easy to figure out for yourself.
First published: 4th October 2023