Deploy Passbolt Through Docker
Steps
Create GPG Key
Create a GPG key with no passphrase. I strongly recommend you use the example below, which is a modified version taken from the Passbolt docs.
MY_EMAIL="my.name@gmail.com"
REAL_NAME="IT Admin"
KEY_LENGTH=3072

gpg  --batch --no-tty --gen-key <<EOF
    Key-Type: RSA
    Key-Length: $KEY_LENGTH
    Subkey-Type: RSA
    Subkey-Length: $KEY_LENGTH
    Name-Real: $REAL_NAME
    Name-Email: $MY_EMAIL
    Expire-Date: 0
    %no-protection
    %commit
EOF
Output the fingerprint of the key and make a note of it. We will need this later for our environment file.
gpg --list-keys --fingerprint
It should output something like:
54C6 4738 18D7 DB06 A133 E453 6531 F684 FED9 15E3
However, when you place it in your environment file later, you need to take out the spaces, so the above would become:
54C6473818D7DB06A133E4536531F684FED915E3
Execute the following commands to create an area for our Passbolt files, and output the kesy there in order for the passbolt container to be able to bind-mount them later:
EMAIL="my.email@mydomain.com"

mkdir -p ~/passbolt/volumes/gpg
gpg --armor --export-secret-keys $EMAIL > ~/passbolt/volumes/gpg/serverkey_private.asc
gpg --armor --export $EMAIL > ~/passbolt/volumes/gpg/serverkey.asc
chmod 640 ~/passbolt/volumes/gpg/serverkey*
EMAIL should be set to whatver email you set when creating the GPG key earlier.
Optional - Create SSL Certificates
If you aren't using a reverse proxy, such as Nginx Proxy Manager, then it is up to you to create trusted TLS certificates in whichever way is appropriate to you (relevant tutorials).
However, if you are using a reverse proxy, then you should okay to skip this step, and just make sure the reverse proxy has trusted TLS certificates.
Once you have the certificate files, make an area for them and put them there:
mkdir -p ~/passbolt/volumes/ssl
Make sure they have the following names within that folder (or adjust the docker-compose.yaml file later according to what names you have).
- certificate.crt:ro - the full chain file (e.g. the site certificate and the CA certificate(s) combined).
- certificate.key - the private key (often referred to as private.pem)
Create Env File
Create an environment file:
editor ~/passbolt/.env
And copy/paste the following into it, with the setting values as appropriate to you (e.g. see previous instructions about GPG key fingerprint etc).
# Specify the docker namespace
COMPOSE_PROJECT_NAME="passbolt"


# Specify the version of Passbolt you wish to use.
PASSBOLT_VERSION="4.10.1-1-ce"


# Specify the length of your GPG key. E.g. is it 2048, 3072, or 4096.
PASSBOLT_KEY_LENGTH=3072


# Specify the database details
DATABASE_NAME=passbolt
DATABASE_USERNAME=passbolt
DATABASE_PASSWORD=""


# Specify the fully qualified domain name (FQDN) for your passbolt server.
# E.g. passbolt.mydomain.com
FQDN=passbolt.mydomain.com


# Specify SMTP settings
# If using gmail, generate an app specific password here:
# https://security.google.com/settings/security/apppasswords
SMTP_EMAIL="my.email@gmail.com"
SMTP_HOST="smtp.gmail.com"
SMTP_PORT=587
SMTP_USERNAME="my.email@gmail.com"
SMTP_PASSWORD=""

# Specif a salt to be used by passbolt for encryption.
# You can generate this with
# head /dev/urandom | tr -dc A-Za-z0-9 | head -c24
SECURITY_SALT=""


# Specify the email address that was used when generating the GPG key
GPG_KEY_EMAIL="my.email@mydomain.com"

# Specify the fingerprint for the GPG key being used.
# You can find this by running gpg2 --list-keys
GPG_KEY_FINGERPRINT=


# force ssl
PASSBOLT_SSL_FORCE=true
Create Docker Compose File
Now we need to create the Docker compose file:
editor ~/passbolt/docker-compose.yaml
Depending on whether you have generated your own TLS certificates or not, choose one of the following two options:
Option 1 - Using Passbolt Generated Self-signed Certificates
If you wish to use a reverse proxy, that will manage your certificates (e.g. generate trusted ones through Let's Encrypt etc), then you can just allow Passbolt to generate its own self-signed certificates and use the following for your docker-compose.yml file:
services:
  app:
    container_name: passbolt
    image: passbolt/passbolt:${PASSBOLT_VERSION}
    restart: always
    ports:
      - "80:80"
      - "443:443"
    depends_on:
      - db
    logging:
      driver: "json-file"
      options:
        max-size: "10m"
        max-file: "3"
        compress: "true"
    volumes:
      # Create a volume for storing the TLS certificates that passbolt generates
      - $HOME/passbolt/ssl:/etc/ssl/certs

      # These should be the public and private keys of the GPG key the server should
      # use.
      - ./volumes/gpg/serverkey_private.asc:/etc/passbolt/gpg/serverkey_private.asc:ro
      - ./volumes/gpg/serverkey.asc:/etc/passbolt/gpg/serverkey.asc:ro

    environment:
      - DATASOURCES_DEFAULT_HOST=db
      - DATASOURCES_DEFAULT_PASSWORD=${DATABASE_PASSWORD}
      - DATASOURCES_DEFAULT_USERNAME=${DATABASE_USERNAME}
      - DATASOURCES_DEFAULT_DATABASE=${DATABASE_NAME}
      - APP_FULL_BASE_URL=https://${FQDN}
      - EMAIL_DEFAULT_FROM=${SMTP_EMAIL}
      - EMAIL_TRANSPORT_DEFAULT_HOST=${SMTP_HOST}
      - EMAIL_TRANSPORT_DEFAULT_PORT=${SMTP_PORT}
      - EMAIL_TRANSPORT_DEFAULT_USERNAME=${SMTP_USERNAME}
      - EMAIL_TRANSPORT_DEFAULT_PASSWORD=${SMTP_PASSWORD}
      - EMAIL_TRANSPORT_DEFAULT_TLS=1
      - SECURITY_SALT=${SECURITY_SALT}
      - SERVER_KEY_EMAIL=${GPG_KEY_EMAIL}
      - PASSBOLT_GPG_SERVER_KEY_FINGERPRINT=${GPG_KEY_FINGERPRINT}
      - PASSBOLT_GPG_SERVER_KEY_PUBLIC=/etc/passbolt/gpg/serverkey.asc
      - PASSBOLT_GPG_SERVER_KEY_PRIVATE=/etc/passbolt/gpg/serverkey_private.asc
      - PASSBOLT_KEY_LENGTH
      - PASSBOLT_SSL_FORCE


  db:
    image: mariadb:10.11.8-jammy
    container_name: db
    restart: always
    logging:
      driver: "json-file"
      options:
        max-size: "10m"
        max-file: "3"
        compress: "true"
    volumes:
      - passbolt-db-data:/var/lib/mysql
    environment:
      - MARIADB_RANDOM_ROOT_PASSWORD=1
      - MARIADB_DATABASE=${DATABASE_NAME}
      - MARIADB_USER=${DATABASE_USERNAME}
      - MARIADB_PASSWORD=${DATABASE_PASSWORD}


volumes:
  passbolt-db-data:
    driver: local
Option 2 - Using Own Certificates
If you are providing your own TLS certificates then use the following configuration that passes them through in read-only mode so that they can't get edited by accident.
services:
  app:
    container_name: passbolt
    image: passbolt/passbolt:${PASSBOLT_VERSION}
    restart: always
    ports:
      - "80:80"
      - "443:443"
    depends_on:
      - db
    logging:
      driver: "json-file"
      options:
        max-size: "10m"
        max-file: "3"
        compress: "true"
    volumes:
      # This should be your certificates public certificate. This should
      # be the "nginx style" where any certificiate authority chain files
      # are included as well.
      - ./volumes/ssl/certificate.crt:/etc/ssl/certs/certificate.crt:ro

      # This should be the private key for your SSL certificate.
      # Often called private.pem
      - ./volumes/ssl/certificate.key:/etc/ssl/certs/certificate.key:ro

      # These should be the public and private keys of the GPG key the server should
      # use.
      - ./volumes/gpg/serverkey_private.asc:/etc/passbolt/gpg/serverkey_private.asc:ro
      - ./volumes/gpg/serverkey.asc:/etc/passbolt/gpg/serverkey.asc:ro

    environment:
      - DATASOURCES_DEFAULT_HOST=db
      - DATASOURCES_DEFAULT_PASSWORD=${DATABASE_PASSWORD}
      - DATASOURCES_DEFAULT_USERNAME=${DATABASE_USERNAME}
      - DATASOURCES_DEFAULT_DATABASE=${DATABASE_NAME}
      - APP_FULL_BASE_URL=https://${FQDN}
      - EMAIL_DEFAULT_FROM=${SMTP_EMAIL}
      - EMAIL_TRANSPORT_DEFAULT_HOST=${SMTP_HOST}
      - EMAIL_TRANSPORT_DEFAULT_PORT=${SMTP_PORT}
      - EMAIL_TRANSPORT_DEFAULT_USERNAME=${SMTP_USERNAME}
      - EMAIL_TRANSPORT_DEFAULT_PASSWORD=${SMTP_PASSWORD}
      - EMAIL_TRANSPORT_DEFAULT_TLS=1
      - SECURITY_SALT=${SECURITY_SALT}
      - SERVER_KEY_EMAIL=${GPG_KEY_EMAIL}
      - PASSBOLT_GPG_SERVER_KEY_FINGERPRINT=${GPG_KEY_FINGERPRINT}
      - PASSBOLT_GPG_SERVER_KEY_PUBLIC=/etc/passbolt/gpg/serverkey.asc
      - PASSBOLT_GPG_SERVER_KEY_PRIVATE=/etc/passbolt/gpg/serverkey_private.asc
      - PASSBOLT_KEY_LENGTH
      - PASSBOLT_SSL_FORCE

  db:
    image: mariadb:10.11.8-jammy
    container_name: db
    restart: always
    logging:
      driver: "json-file"
      options:
        max-size: "10m"
        max-file: "3"
        compress: "true"
    volumes:
      - passbolt-db-data:/var/lib/mysql
    environment:
      - MARIADB_RANDOM_ROOT_PASSWORD=1
      - MARIADB_DATABASE=${DATABASE_NAME}
      - MARIADB_USER=${DATABASE_USERNAME}
      - MARIADB_PASSWORD=${DATABASE_PASSWORD}

volumes:
  passbolt-db-data:
    driver: local
Deploy
Now you can deploy by simply running:
docker compose up
docker-compose up instead.
Now navigate to your server's domain name in your browser, and step through the installation steps.
First Login
To log in for the first time and set things up, you need to enter the running container:
docker exec -it passbolt /bin/bash
Then run the following to register your first admin user (swapping out the values as appropriate).
EMAIL="bob.geldof@gmail.com"
FIRST_NAME="Bob"
LAST_NAME="Geldof"

COMMAND="/usr/share/php/passbolt/bin/cake passbolt register_user -u $EMAIL -f $FIRST_NAME -l $LAST_NAME -r admin"
su -s /bin/bash -c "$COMMAND" www-data
This should send you an email with instructions on setting up for the first time. Thus, it is super important to make sure your SMTP settings are correct.
Updating
Updating should be as easy as changing the passbolt version in your docker-compose file, but you may wish to refer here if there has been a major version change.
Debugging
Check Emailing Works
Enter the container by running:
docker exec -it passbolt /bin/bash
Run the following command to send yourself a test email to check emailing works:
MY_EMAIL="something@gmail.com"
sudo ./bin/cake passbolt send_test_email --recipient=$MY_EMAIL
Emails Not Sending - Hetzner And Port 465
- Hetzner blocks port 465 in their firewall by default.
- WHM/cpanel appears to use port 465, so this won't work.
If you have this combination, then I recommend you use an SMTP provider like Gmail, or Amazon SES instead. These use port 587 which is not blocked. Alternatively, you may be able to ask Hetzner to unblock your port 465.
The Key Does Not Match Any Account
If you get the message below,that your key does not match any account when performing an account recovery....
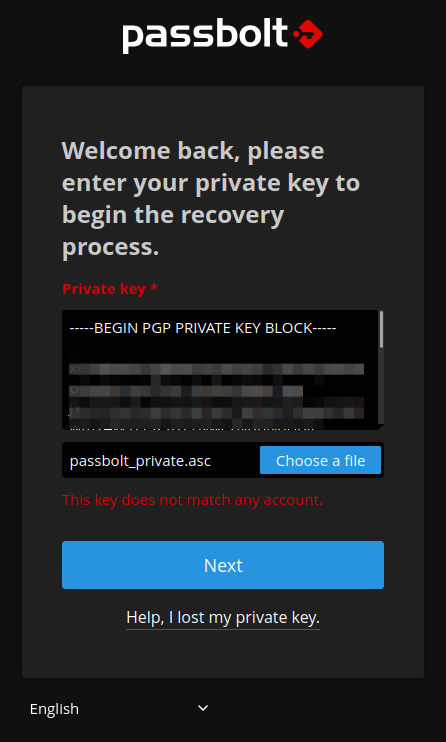
...it means that the server key cannot be used to perform any "verify" operations. One needs to run a healthcheck on the server to see if there are any issues with the key. This will probably show up if you run the healthcheck from the cli..
This issue arose from me generating the key incorrectly, and I resolved it by creating a new key with the way I outlined at the top of this tutorial, before then swapping them around.
Run Healthcheck From CLI
You can run a healthcheck in the Cli by entering the docker container and running:
COMMAND="/usr/share/php/passbolt/bin/cake passbolt healthcheck"
su -s /bin/bash -c "$COMMAND" www-data
References
First published: 28th June 2024