FreeNAS - Set Static IP
Now that we have installed FreeNAS, we probably want to configure the box to use a static IP.
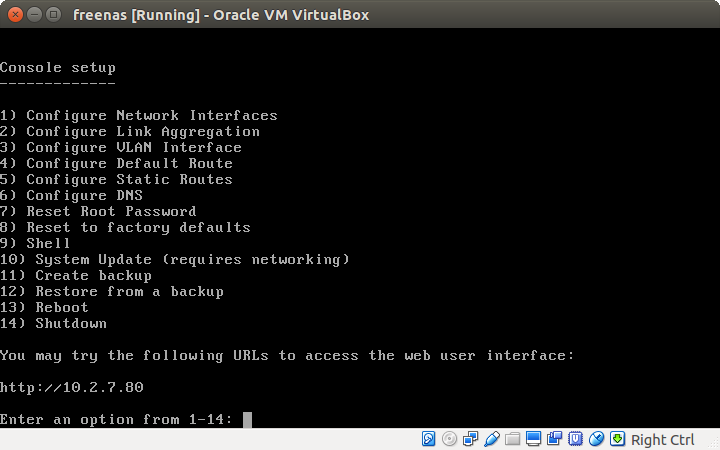
Once FreeNAS has booted up and you see the main menu (below), type 1 then return to start configuring the network interface(s). We only have one in this tutorial.
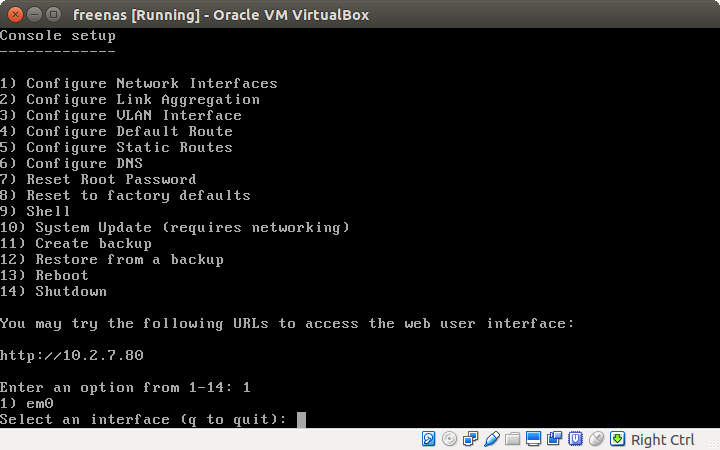
You will then be prompted to select an interface. Enter the number not the name of the interface. E.g. 1.
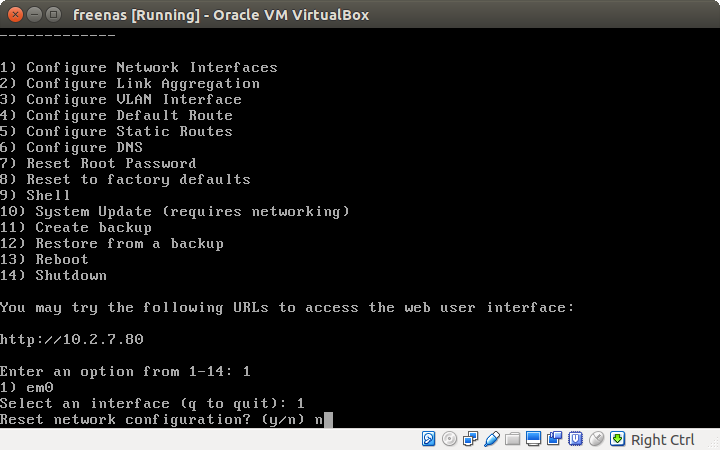
You will be asked if you wish to reset the interface. Enter n for no. We are changing the settings instead.
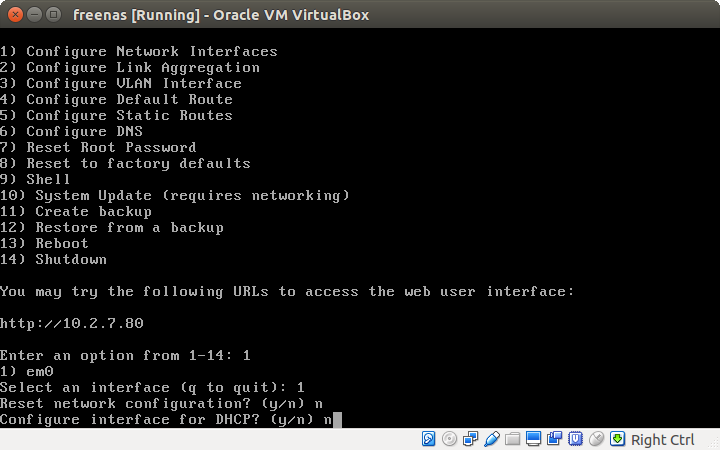
When asked if we are configuring for DHCP, enter n.
You will then be prompted for either a full CIDR or an IP followed by the subnet. I found it easier to enter the latter.
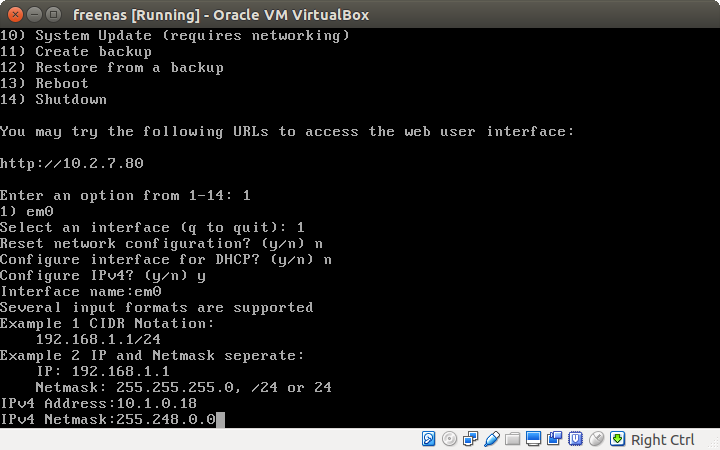
192.168.1.x and 255.255.255.0 where x is the IP you wish to give your FreeNAS box.
Configuration is now complete. You should now see the IP listed on the main menu page.
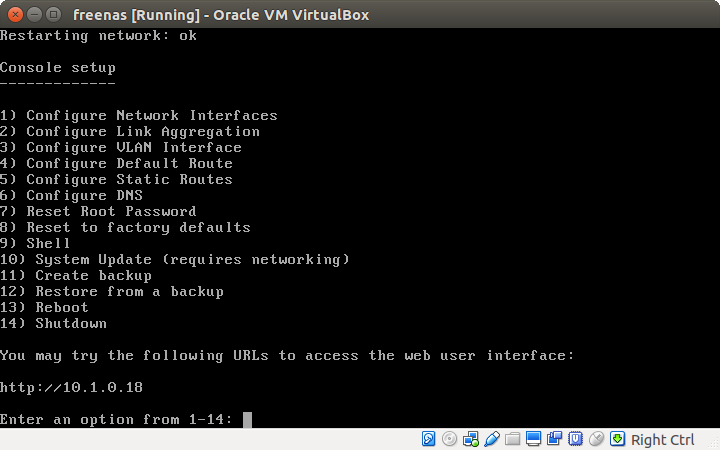
Try and navigate to the address specified and check that you have a web interface. It should look something like below if you were successful.
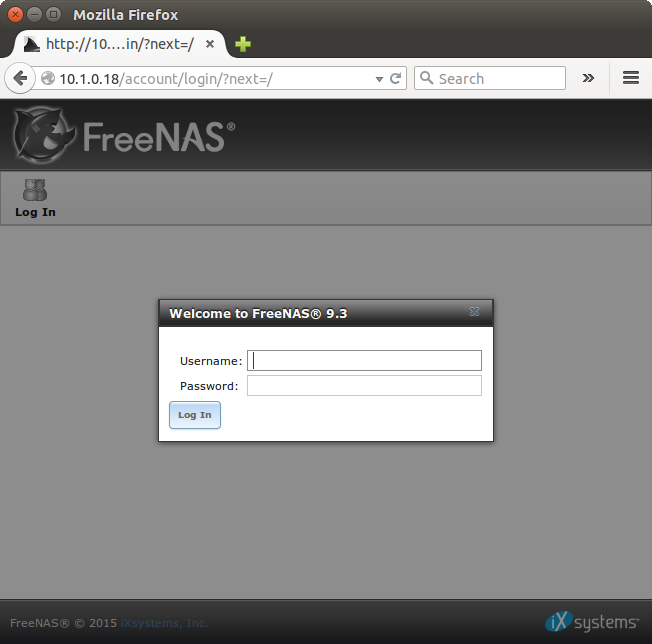
Now we need to reset the root password so that we can manage our box through the web interface.
First published: 16th August 2018