Mailcow - Create SMTP Credentials for Entire Domains
Overview
I recently published SMTP Gateway, a tool for
managing all of my SMTP accounts and credentials, and wanted to use my own
Mailcow email server as a provider in it. Rather than keep going back to
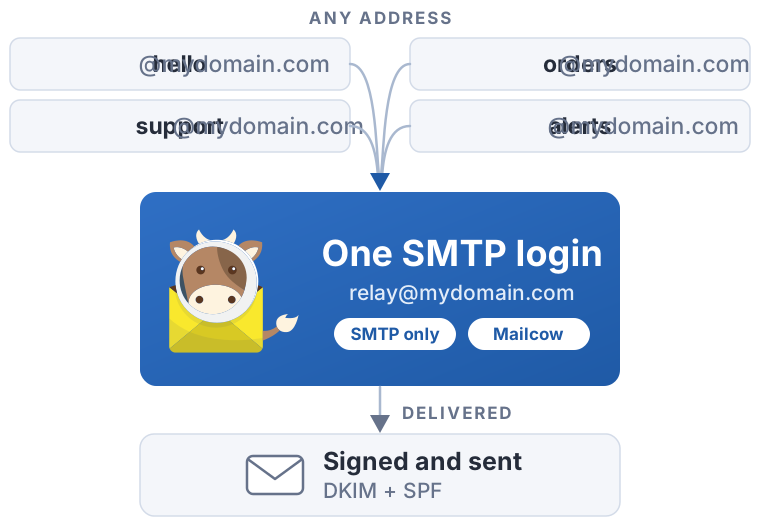
it to create a mailbox or alias for each address I want to send as, this guide sets up a single
SMTP-only mailbox (relay@mydomain.com) that can send as any address on entire domains.
The examples use mydomain.com, so replace it with your own domain. The screenshots show mine.
Security: anyone with these credentials can send as any address on the allowed domains, so keep them safe and use an SMTP-only app password rather than the main password.
Steps
1. Open the Mailboxes page
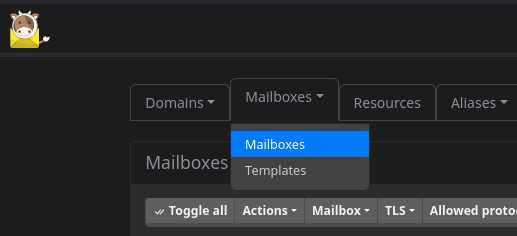
In the mailcow admin interface, open E-Mail > Configuration, then choose Mailboxes > Mailboxes.
2. Add a mailbox
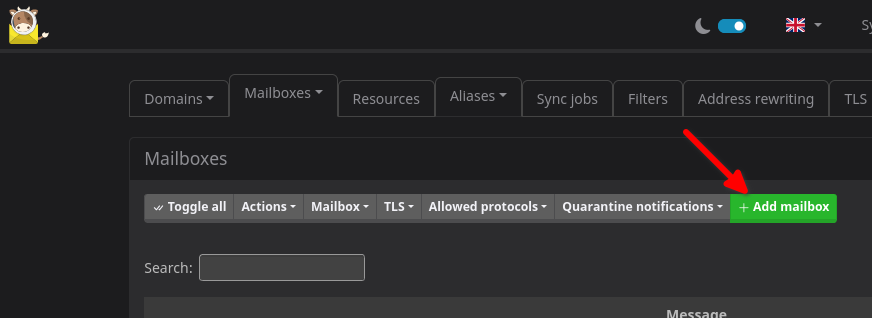
Click Add mailbox.
3. Fill in the mailbox details
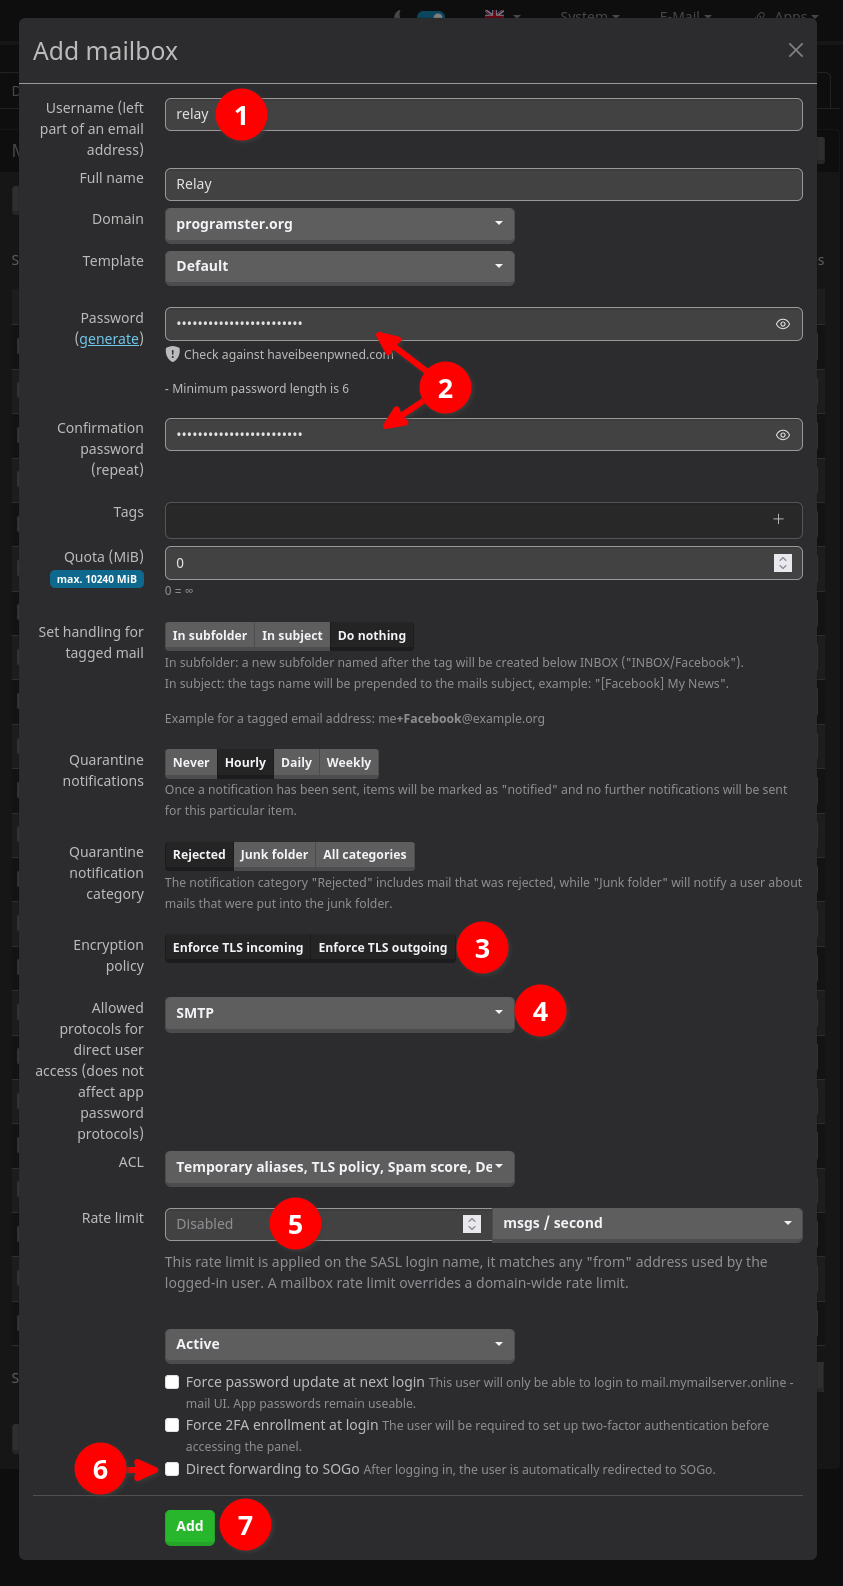
Set Domain to one of your domains, then complete the numbered fields:
- Username: enter only the local part, e.g.
relay. Don't enter the full address. - Password: enter a long, unique password in both fields.
- Encryption policy: enable Enforce TLS incoming and Enforce TLS outgoing. With outgoing enforced, mail to a server that doesn't support TLS won't be delivered.
- Allowed protocols: select SMTP only. This only restricts logins. Mail can still be delivered to the mailbox, but it can't be read over IMAP.
- Rate limit: optionally set a limit, to reduce the damage if the credentials leak. It is left disabled here.
- Direct forwarding to SOGo: leave this unticked, as the mailbox isn't used for webmail.
- Click Add.
4. Edit the new mailbox
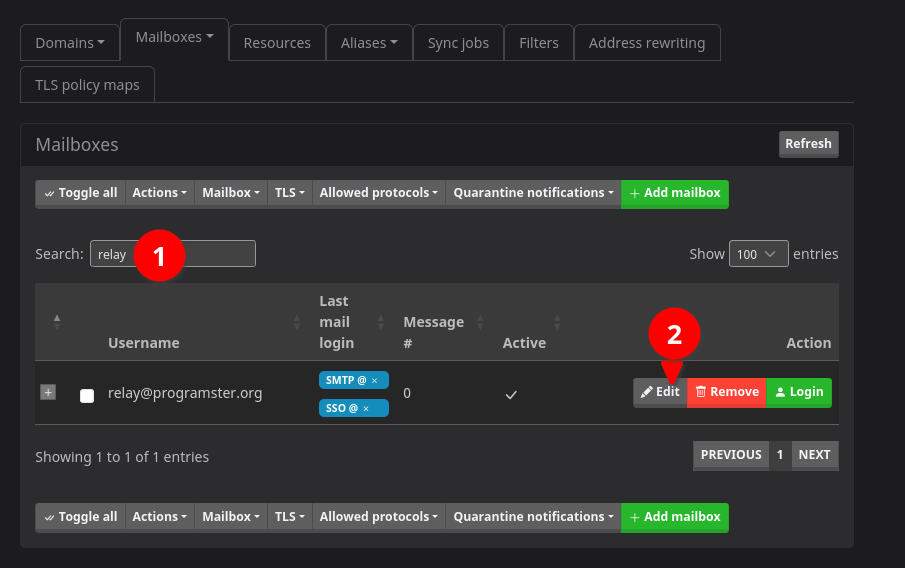
- Search for
relay. - Click Edit next to the mailbox.
5. Allow it to send as your domains
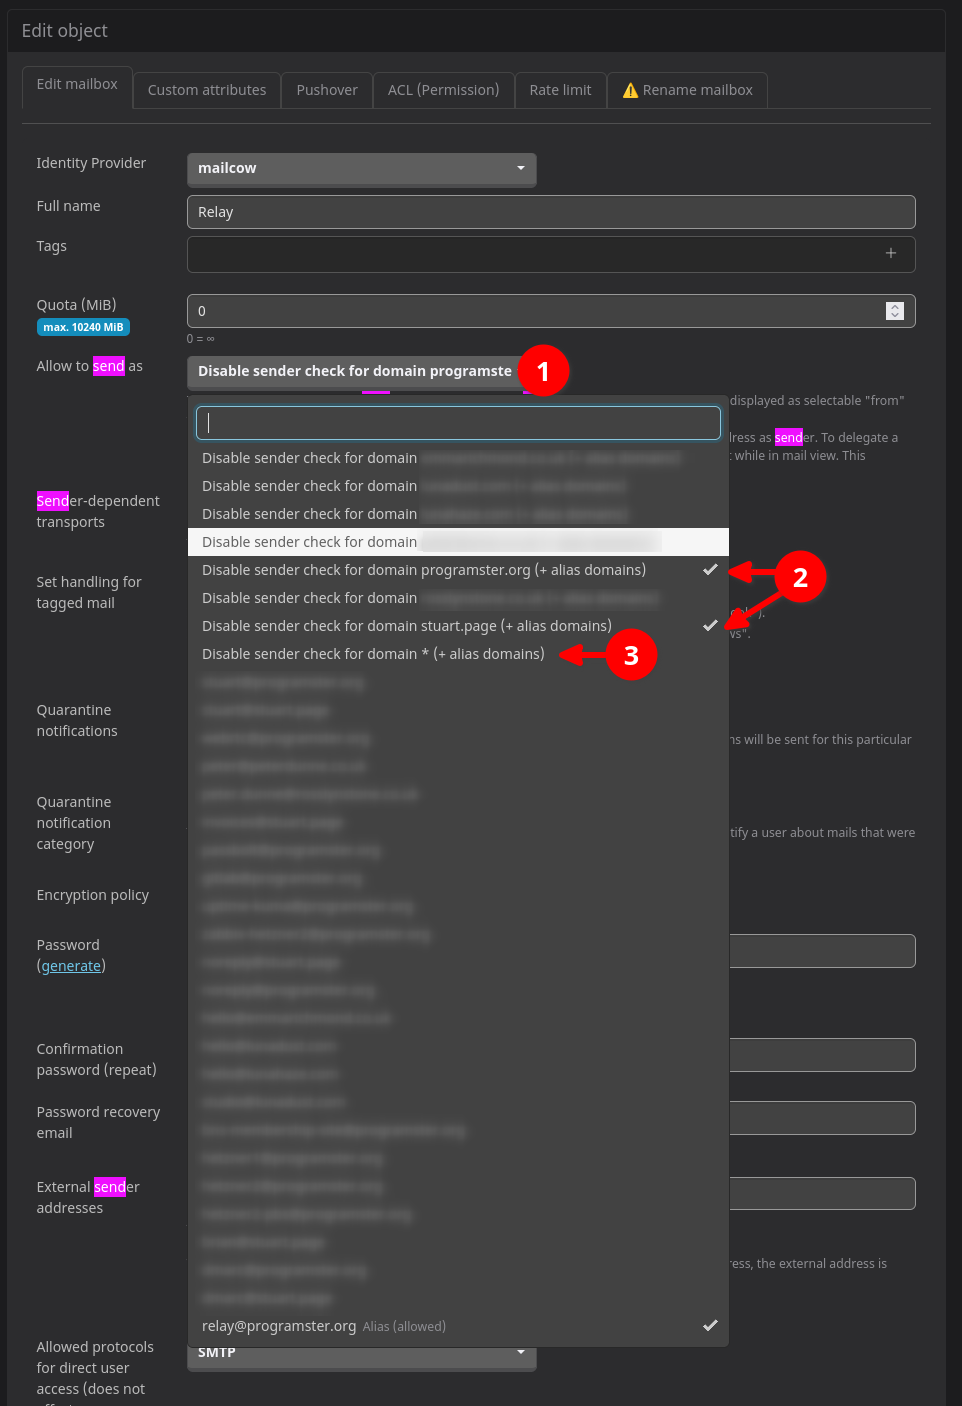
- Open the Allow to send as dropdown.
- Tick Disable sender check for domain..." for each domain you wish for the credentials to be able to be used to send as. I have selected just two (2), as these two domains are the only ones I wish for these credentials to be able to be used to send as.
- If you would rather be completely unrestricted, and be able to send as any of the domains registered in mailcow, (including all future domains), then tick Disable sender check for domain * (+ alias domains) instead. This also allows sending from domains you don't host, so only use it if you really need it.
Save the changes at the bottom of the form.
6. Create an app password (optional)
The mailbox's allowed protocols don't apply to app passwords, so each app password needs its own restriction.
- On the Mailboxes page, click Login next to the relay mailbox.
- Open the App passwords tab and add a new app password.
- Select SMTP as its only protocol, then save it.
Use this password in your apps instead of the main password.
Extra info
DNS requirements
Each domain you send from needs:
- DKIM: generate the domain's key in mailcow's ARC/DKIM keys settings, and publish it in DNS
as the TXT record mailcow shows. mailcow signs each message with the DKIM key of its
Fromdomain. - SPF: a TXT record that includes the mailcow server, e.g.
v=spf1 a:mail.mydomain.com ~all. A domain can only have one SPF record, so add the server to the existing record if there is one.
Sending
Connection settings
| Setting | Value |
|---|---|
| Host | Your mailcow hostname, e.g. mail.mydomain.com |
| Port | 587 (STARTTLS) or 465 (implicit TLS) |
| Username | The full mailbox address, e.g. relay@mydomain.com |
| Password | The app password, or the mailbox password |
From, Reply-To and the envelope sender
| Field | Purpose | Notes |
|---|---|---|
From |
The address recipients see | Must be on an allowed domain |
Reply-To |
Where replies go | If not set, replies go to From |
| Envelope sender | Where bounces go | Not the From header |
The envelope sender (MAIL FROM / Return-Path) is set separately from the From header:
- PHPMailer:
$mail->Sender - Symfony Mailer: the sender of the
Envelopepassed tosend() - sendmail: the
-foption
The envelope sender must:
- be a real mailbox or alias, so that bounces arrive somewhere
- be on an allowed domain, as mailcow checks it against the sender ACL too
- ideally be on the same domain as
From, for SPF/DMARC alignment
Example
Using PHPMailer:
$mail = new PHPMailer(true);
$mail->isSMTP();
$mail->Host = 'mail.mydomain.com';
$mail->Port = 587;
$mail->SMTPSecure = PHPMailer::ENCRYPTION_STARTTLS;
$mail->SMTPAuth = true;
$mail->Username = 'relay@mydomain.com';
$mail->Password = getenv('SMTP_PASSWORD');

$mail->setFrom('orders@mydomain.com', 'Orders');
$mail->addReplyTo('support@mydomain.com');
$mail->Sender = 'bounces@mydomain.com';

$mail->addAddress('customer@example.com');
$mail->Subject = 'Your order';
$mail->Body = 'Thanks for your order.';
$mail->send();
Troubleshooting
If you see the error message: "Mailbox name is invalid" when adding the mailbox, this is
because the Username field takes only the local part. Enter relay rather than
relay@mydomain.com, and pick the domain from the Domain dropdown.
First published: 21st November 2026

The comments are provided by Disqus, which sets cookies, and gets information about your visit, when they're shown.