OpenVPN - Create A User With A Static IP
Having a VPN can be a great way to securely run services/servers from your home network, and be able to access them from anywhere in the world. You can think of this as a "dark net" because unless you open up your router, they should only be accessible through the VPN. In order to set up these services, it is much easier if they are assigned a static IP, so that they don't keep "moving about" and you can even assign them your own DNS settings.
Prerequisites
This tutorial assumes that you have already created an OpenVPN server, preferably with one of my OpenVPN installation tutorials.
On your OpenVPN server, define a directory where the client scripts should be stored.
mkdir /etc/openvpn/staticclients
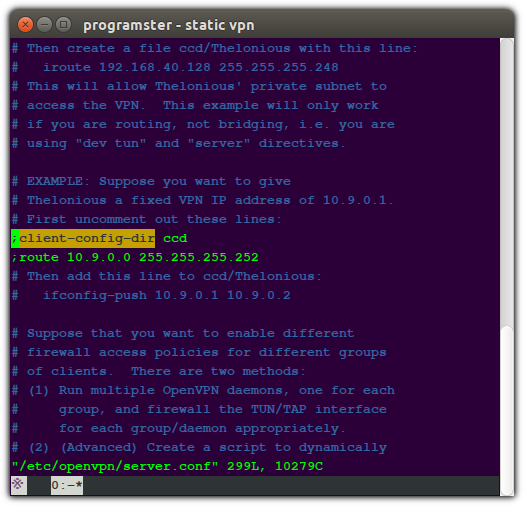
Add this directory as option to your openvpn configfile at the server by replacing the configuration line as shown below:
editor /etc/openvpn/server.conf

Now run one of the following commands depending on your servers VPN topology, and answer all the questions. Whenever it asks you for a name, you MUST use the same name as specified in the CLIENT_NAME variable.
p2p (default)
DESIRED_STATIC_IP="10.8.x.x"
CLIENT_NAME="example-user"

echo "ifconfig-push $DESIRED_STATIC_IP 10.8.0.1" > /etc/openvpn/staticclients/$CLIENT_NAME
cd /etc/openvpn/easy-rsa
. vars
. build-key $CLIENT_NAME
Subnet Topology (Windows Compatible)
For those of you who have changed the topology to "subnet" from the default p2p, you need to replace 10.8.0.1 with the subnet instead as shown below.
DESIRED_STATIC_IP="10.8.x.x"
CLIENT_NAME="example-user"

echo "ifconfig-push $DESIRED_STATIC_IP 255.255.255.0" > /etc/openvpn/staticclients/$CLIENT_NAME
cd /etc/openvpn/easy-rsa
. vars
. build-key $CLIENT_NAME
Copy the relevant configs somewhere where we will compress and encrypt them before sending them to our email address. ALternatively, you can grab them from the server by some other means such as SSHFS
CLIENT_NAME="my-client-name"
mkdir /tmp/vpn.configs
cd /etc/openvpn/easy-rsa/keys/
cp ca.crt $CLIENT_NAME.crt $CLIENT_NAME.key /tmp/vpn.configs
tar --create --gzip --file /tmp/vpn.configs.tar.gz /tmp/vpn.configs
Install postfix in order to send mail, and mutt so we can send ourself mail through the CLI
Ubuntu
sudo apt-get install postfix mutt -y
CentOS
yum install postfix mutt -y
Package, encrypt, and email ourself the files. Thus if anyone intercepts the email, they have to know your encryption key to be able to use the files
gpg \
--cipher-algo AES256 \
--no-use-agent \
--symmetric \
/tmp/vpn.configs.tar.gz

# email yourself the encrypted configs
mutt -a /tmp/vpn.configs.tar.gz.gpg -s "Your VPN configs" -- user@mydomain.com

# cleanup
sudo rm -rf /tmp/vpn.configs
sudo rm -rf /tmp/vpn.configs.tar.gz
sudo rm -rf /tmp/vpn.configs.tar.gz.gpg
Grab the files from your email (you may need to check your spam folder), or using SSHFS and place them in your client server that needs the static IP.
$CONFIG_FILE_PATH in the next step.
Edit the variable names in the following text, and save it on the client machine as client.conf (in the same folder as the other files).
##############################################
# Sample client-side OpenVPN 2.0 config file #
# for connecting to multi-client server.     #
#                                            #
# This configuration can be used by multiple #
# clients, however each client should have   #
# its own cert and key files.                #
#                                            #
# On Windows, you might want to rename this  #
# file so it has a .ovpn extension           #
##############################################

# Specify that we are a client and that we
# will be pulling certain config file directives
# from the server.
client

# Use the same setting as you are using on
# the server.
# On most systems, the VPN will not function
# unless you partially or fully disable
# the firewall for the TUN/TAP interface.
;dev tap
dev tun

# Windows needs the TAP-Win32 adapter name
# from the Network Connections panel
# if you have more than one.  On XP SP2,
# you may need to disable the firewall
# for the TAP adapter.
;dev-node MyTap

# Are we connecting to a TCP or
# UDP server?  Use the same setting as
# on the server.
;proto tcp
proto udp

# The hostname/IP and port of the server.
# You can have multiple remote entries
# to load balance between the servers.
remote $VPN_SERVER_IP 1194
;remote my-server-2 1194

# Choose a random host from the remote
# list for load-balancing.  Otherwise
# try hosts in the order specified.
;remote-random

# Keep trying indefinitely to resolve the
# host name of the OpenVPN server.  Very useful
# on machines which are not permanently connected
# to the internet such as laptops.
resolv-retry infinite

# Most clients don't need to bind to
# a specific local port number.
nobind

# Downgrade privileges after initialization (non-Windows only)
;user nobody
;group nobody

# Try to preserve some state across restarts.
persist-key
persist-tun

# If you are connecting through an
# HTTP proxy to reach the actual OpenVPN
# server, put the proxy server/IP and
# port number here.  See the man page
# if your proxy server requires
# authentication.
;http-proxy-retry # retry on connection failures
;http-proxy [proxy server] [proxy port #]

# Wireless networks often produce a lot
# of duplicate packets.  Set this flag
# to silence duplicate packet warnings.
;mute-replay-warnings

# SSL/TLS parms.
# See the server config file for more
# description.  It's best to use
# a separate .crt/.key file pair
# for each client.  A single ca
# file can be used for all clients.
ca $CONFIG_FILE_PATH/ca.crt
cert $CONFIG_FILE_PATH/$CLIENT_NAME.crt
key $CONFIG_FILE_PATH/$CLIENT_NAME.key

# Verify server certificate by checking
# that the certicate has the nsCertType
# field set to "server".  This is an
# important precaution to protect against
# a potential attack discussed here:
#  http://openvpn.net/howto.html#mitm
#
# To use this feature, you will need to generate
# your server certificates with the nsCertType
# field set to "server".  The build-key-server
# script in the easy-rsa folder will do this.
ns-cert-type server

# If a tls-auth key is used on the server
# then every client must also have the key.
;tls-auth ta.key 1

# Select a cryptographic cipher.
# If the cipher option is used on the server
# then you must also specify it here.
;cipher x

# Enable compression on the VPN link.
# Don't enable this unless it is also
# enabled in the server config file.
comp-lzo

# Set log file verbosity.
verb 3

# Silence repeating messages
;mute 20
Optional - Add DNS Option
If you wish, you could set your computer to use a specific DNS server when you connect using the client config. This is useful if you wish to have your computer know what the other computers on the network you just connected to are. Just add the following line to the client config from the previous step.
dhcp-option DNS 10.11.12.13
Build and Run a VPN Script
Create a script with the following contents in the same folder as where you stuck all the configuration files.
#!/bin/bash
SCRIPT=$(readlink -f "$0")
DIR=$(dirname "$SCRIPT")
sudo /usr/sbin/openvpn --config $DIR/client.conf --script-security 2
Call the script you just created, with Bash, in order to start the VPN connection
References
- Michls Tech Blog - OpenVPN: Set a static IP Address for a client
- ServerFault - OpenVPN: Add clients without rebuilding all keys?
- How to ensure OpenVPN connection uses specific DNS?
First published: 16th August 2018