Proxmox - Deploy A Debian 12 LXC Container
Steps
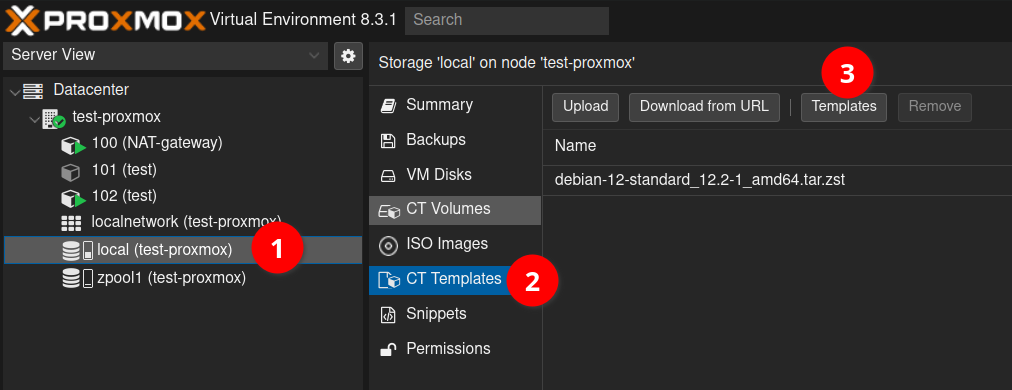
Download Debian 12 Template
Click on your local storage (1), select the CT Templates (2), and then click the button to Templates (3) button.
Search for "debian" (1), before then selecting debian-12-standard (2), and clicking the download button (3).

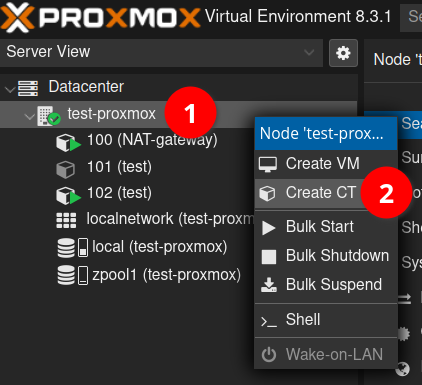
Create The Container
Now right-click on your proxmox node (1) and select Create CT from the menu (2).
In the dialogue box that appears, give a hostname to your service (1). This will determine how it shows up in proxmox once it is created. Provide the password for the root user, so that you can log in from the proxmox shell later (2). It would be a good idea to add your public SSH keys here (3), but we can always set those up later from inside the terminal if required. Finally, it is worth noting that the unpriviledged container is ticked by default (4). This is generally a good idea for security. Also, nesting is ticked by default. This is required for things like Docker to work within the container later.

On the next tab, we pick the template we are creating the container from. Storage in this case is the storage drive that we are looking for the templates in, not where the created container is going to be stored. Select the Debian 12 template we downloaded earlier. If you skipped that step, go back and download the Debian 12 template.

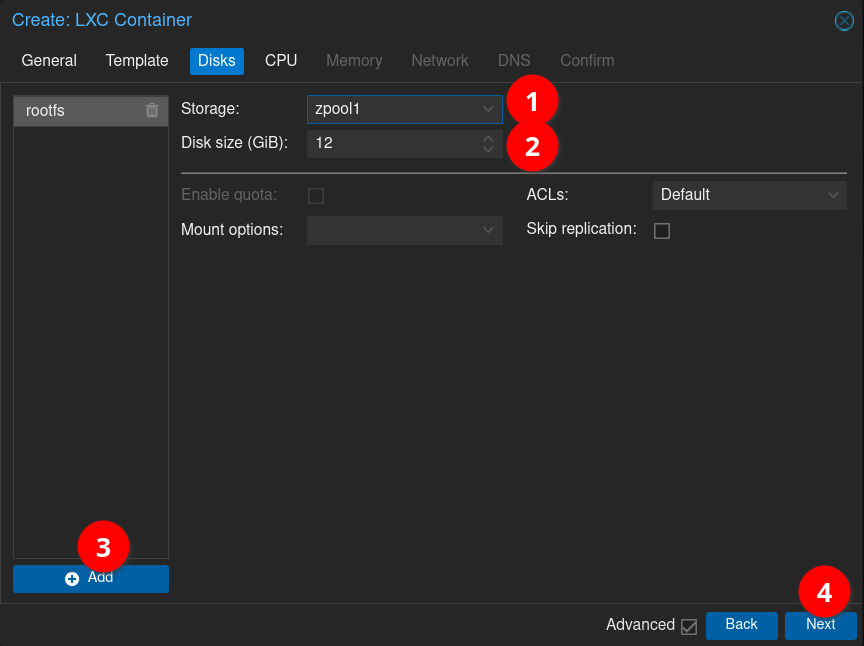
Next, we need to configure the storage we want for the container. Select the host storage device (1) that you wish to put the root disk of the container. For me, I use a ZFS pool that I set up on the host, because ZFS allows you to snapshot your containers. Set the amount of storage for the container (2). This defaults to just 8GB which I find to be just a little bit too small, so I would recommend going at least 12GB or more. If you want your container to have secondary storage drives, then you can configure them by pressing Add (3). Then click Next.
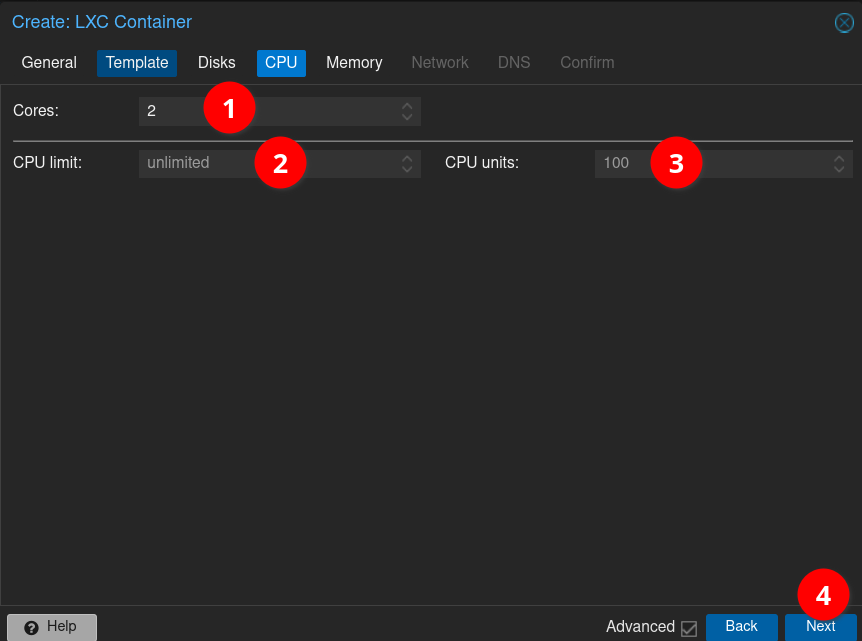
Next, we configure the CPU for the container. I would recommend setting the number of cores (1) to 2 or higher depending on your workload.
The CPU limit (2) can be set to limit the CPU usage as a whole. E.g. if you set this to 0.5, then all of the work across all of the assigned cores
won't add up to more than half of a single core. I find that the CPU units (3) is a more useful metric, as it is a weighted figure passed to the
CPU scheduler with all of the other containers in order to determine priority. Thus, you could have all of your containers have access to all of
the cores on a host, but provide more CPU units to your more important services, to ensure that when the CPU has to sacrifice a workload, your
important services are prioritized. Where this falls down is that you will probably need to keep track of these numbers across your containers
in a spreadsheet, and keep it updated, if you want an effective system. When you've made your decisisions, click next (4).
Allocate how much memory your container should be provided with. This defaults to just 512MB and I find that most things require at least 768MB these days.
Also, you can choose how much of your host's swap space that the container is allowed to use.

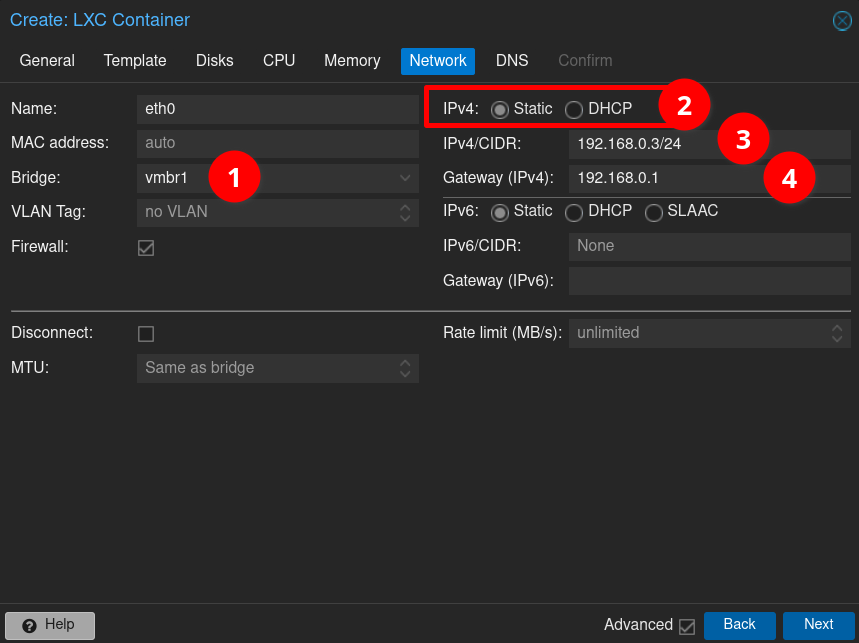
The next step is to configure the networking. Everyone's networking requirements are different, but I think it's worth just briefly covering the main things which are to make sure you assign the correct bridge (1), choose whether you are using static, or DHCP IP allocation (2), and if you are using static IPs, to provide the address (3) and gateway (4). Please note that if you are setting up a NAT container on a routed proxmox setup, then your gateway needs to be that of the Proxmox hosts's internal/private IP address. If this is a "normal" container in a routed setup, then the gateway needs to be internal IP that you gave to your NAT container.
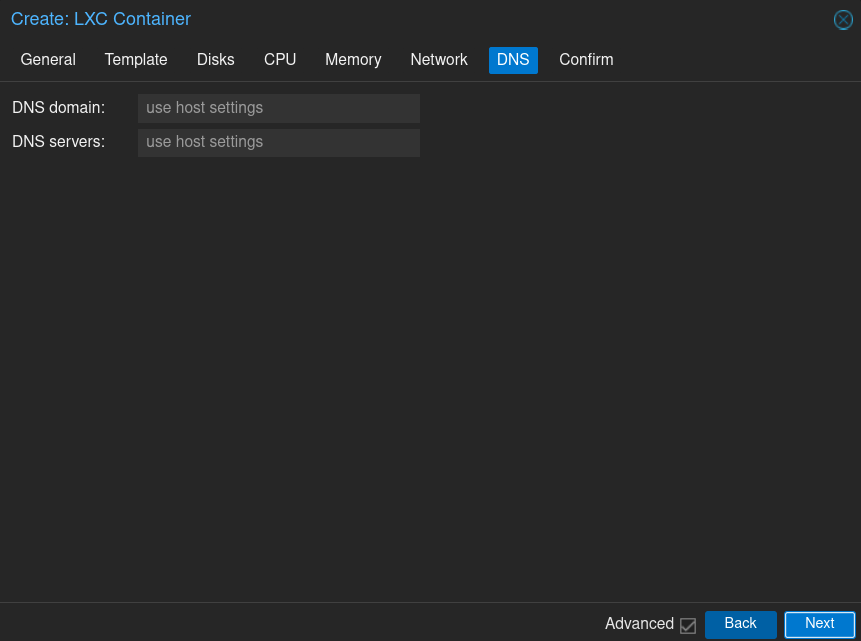
The next step is configuring DNS, which you can probably skip, unless you know that you don't want to use the settings that the host uses.
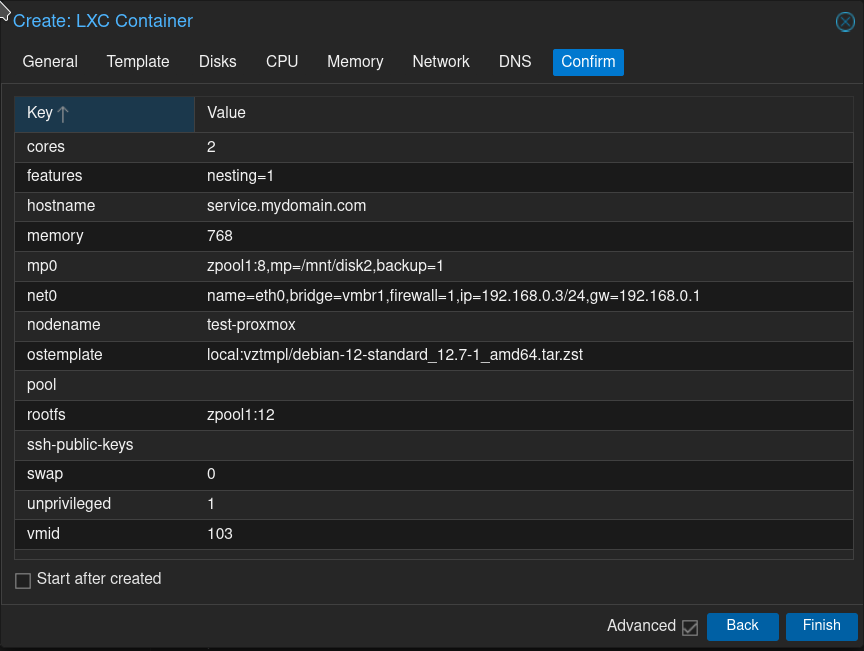
Finally, you just get a confirmation screen to review your settings. If you are happy, click Finish.
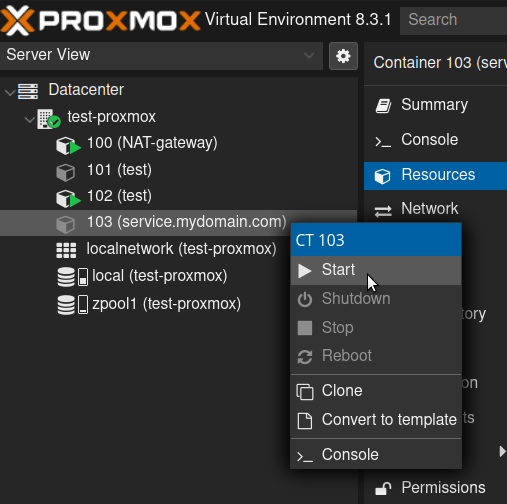
That's it. You've now created your container. You can right-click it and click start, to start the container.
Then double click the name of the container to open up a shell, in which you can log in with the username root, and the password you set earlier.
First published: 19th December 2024