Share Windows Folder With Linux
In this tutorial I will show you how to set up a share on windows and then mount it on a Linux computer.
In the past, I have configured Samba shares on Linux servers to share files with Windows because our servers all run on Linux, but my colleagues prefer to develop in Windows. This is not ideal because the windows-side will "go slow", with Netbeans auto-complete functionality appearing to suffer. Another drawback is that windows realizes that it is a network mount, and will no longer show TortoiseSVN status emblems to indicate whether a folder has outstanding changes etc. Sharing the other way round with Windows -> Linux resolves these issues.
Check Windows Settings
Open your Network and Sharing Center.
Click on "Change advanced sharing settings".
Make sure that:
- network discovery is on.
- file and printer sharing is on.
- password protected sharing is on.
- keep the default 128 bit encrypted file sharing.
- Allow Windows to manage homegroup connections (recommended)
Create the Share
Create a folder that you wish to share with other computers. I prefer to keep these folders directly in C: for simplicity. In this case I have created a folder called C:\code.
Right click the folder and click Properties.

Click the Sharing tab and then click Advanced Sharing.
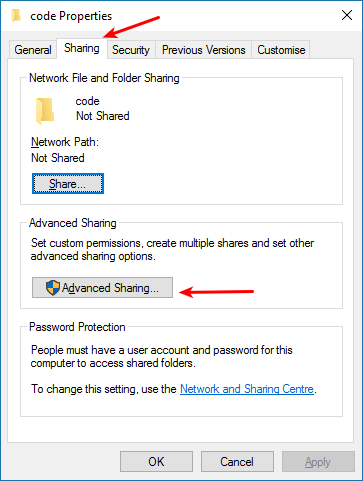
Click Share this folder and then click Permissions:
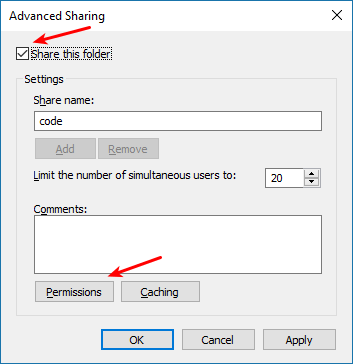
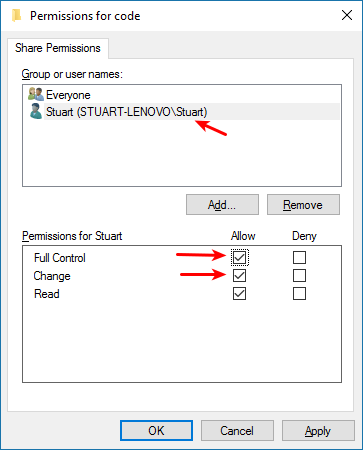
Click Add to add a specific user.
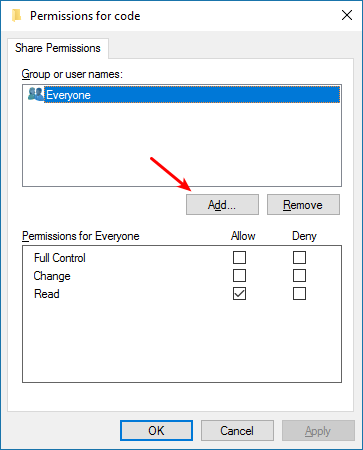
In the box that now appears...

Type your username into the box and then click Check Names.

The computer should give the full system name for the user as it needs it. You can then click OK.
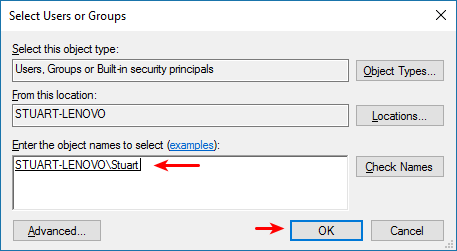
Now make sure your own username is selected, and then ensure that Full Control and Change are selected.
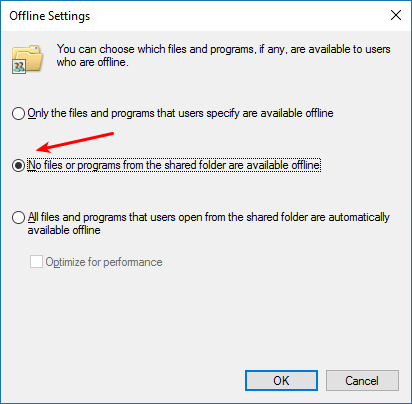
Go back to the Advanced Sharing Window and click the Caching button.
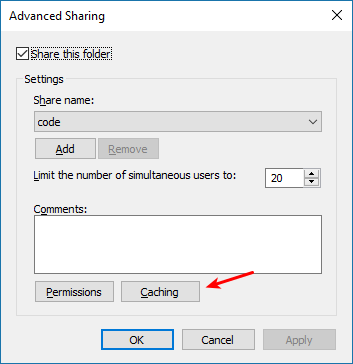
Click the option to disable caching. This seems to make things work immediately.
Mount the Files on Linux
Install the necessary packages:
sudo apt update && sudo apt install cifs-utils
Create a location to mount your windows share and mount it with the following script (make sure to fill in your settings as appropriate).
# Settings
MOUNT_LOC=$HOME/code
WINDOWS_MACHINE_IP=191.68.1.70
WINDOWS_USER="stuart"
USER_ID=`id -u`
SHARE_NAME="code"

# Create our mount location
mkdir -p $MOUNT_LOC

# Mount the windows share
sudo mount -t cifs \
-o user=$WINDOWS_USER,uid=$USER_ID,gid=$USER_ID,rw \
//$WINDOWS_MACHINE_IP/$SHARE_NAME \
$MOUNT_LOC
Thats it! You should now be able to view all the files in your mounted directory and edit them, or create new ones. If you find that you are unable to edit or create files, please make sure to re-visit the steps for adding yourself to share permissions and setting full control. If you are unable to mount the directory, be sure to check that you disabled caching, and that all your settings are correct, such as the windows username, and the IP address of the windows machine.
Debugging Issues
I recently fixed an issue someone had doing this which was somehow due to their computer account being a "Microsoft" account rather than just a local computer account. Either that or it was using their full name and had a problem with spaces. The result being that they kept getting permission denied messages in linux whilst mounting the share. For simplicity, I recommend you use local user accounts that are all lower-case and only a single word. E.g. stuart, kevin, or mark etc.
References
First published: 16th August 2018