Deploying Rundeck Through Docker
What Is Rundeck?
I would describe Rundeck (from PagerDuty) as simply a wrapper around Ansible, to provide a web interface for running Ansible scripts (playbooks).
The Rundeck docs describe Rundeck as: "Rundeck is runbook automation that gives you and your colleagues self-service access to the processes and tools they need to get their job done.".
It appears to have a business model similar to Gitlab, in that there is a free and opensource version (which I will provide tutorials for), and there is an enterprise version you can pay for.
Rundeck Versions Note?
This tutorial's example configuration files are set to deploy Rundeck 4 even though Rundeck 5 has been out for quite some time now. You can use the exact same steps to deploy version 5, and simply change the version number in the environment file during the process. However, it is worth noting that at the time of writing this, there is an issue with configuring Rundeck 5 through Terraform/Tofu, which still has not been resolved. When that has been resolved, I will switch over to Rundeck 5, and update this tutorial accordingly.
Deployment Steps
System Requirements
The first thing you need to do is deploy a server with at least the following specs:
- 2 vCPU
- More than 4 GB RAM (4GB for the Rundeck JVM alone, then there is the database on top).
- 20 GB disk
Create User Authentication File
Before we get started, we need to set our users up. For now, just create a file called user-logins.txt...
touch user-logins.txt
editor user-logins.txt
...with the following content (be sure to change setYourPasswordHere to something else that is alphanumeric.
#
# This file defines users passwords and roles for a HashUserRealm
#
# The format is
#  <username>: <password>[,<rolename> ...]
#
# Passwords may be clear text, obfuscated or checksummed.
#
# This sets the default user accounts for the Rundeck apps
#
admin:setYourPasswordHere,user,admin
Create Docker Compose File
Using PostgreSQL as a backend, because the default without having a database backend will make use of H2, an embedded database that is not considered safe for production because it is not resilient if Rundeck is not shutdown gracefully. - source
version: '3'

services:
  rundeck:
    image: rundeck/rundeck:${RUNDECK_VERSION:-4.17.6}
    container_name: rundeck
    environment:
      RUNDECK_DATABASE_DRIVER: org.postgresql.Driver
      RUNDECK_DATABASE_USERNAME: rundeck
      RUNDECK_DATABASE_PASSWORD: Rundeck123
      RUNDECK_DATABASE_URL: jdbc:postgresql://postgres/rundeck?autoReconnect=true&useSSL=false&allowPublicKeyRetrieval=true
      RUNDECK_GRAILS_URL: ${PUBLIC_URL:-http://localhost:4440}
    depends_on:
      - postgres
    restart: always
    ports:
      - "4440:4440"
    volumes:
      # Create a volume for managing the authentication via a file
      - ./user-logins.txt:/home/rundeck/server/config/realm.properties

      # Create an area for node definitions using files.
      - ./node-definitions:/home/rundeck/node-definitions

  postgres:
    image: postgres:${POSTGRES_VERSION:-15-bullseye}
    container_name: postgres
    restart: always
    environment:
      - POSTGRES_DB=rundeck
      - POSTGRES_USER=rundeck
      - POSTGRES_PASSWORD=Rundeck123
    volumes:
      - dbdata:/var/lib/postgresql/data

volumes:
  dbdata:
Rundeck123 for the database.
This is only "safe" because the database is not exposed on the host, so be sure to not change the file to expose the database ports.
If you do wish to expose the database, then be sure to have changed the database password.
Create Env File
It is a good idea to now create an environment file with the following contents, making sure to fill in the PUBLIC_URL as appropriate.
COMPOSE_PROJECT_NAME=rundeck


# Specify the URL that you connect to Rundeck on.
# This should include http:// or https:// at the beginning.
PUBLIC_URL=""


# Specify the dockerhub rundeck tag to use.
RUNDECK_VERSION="4.10.0"


# Specify the Postrges dockerhub tag to use.
POSTGRES_VERSION="15.2-bullseye"
This allows you to upgrade the PostgreSQL and rundeck versions as and when you want by specifying specific versions. This way you will only upgrade when you are ready and know what is going on.
http://localhost:4440
Start Containers
Run the following command to start the Docker containers using the Docker compose file:
docker-compose up -d
-d runs the containers silently in the background. Feel free to remove it, but you will need to run the command inside a session (tmux/screen) if you do.
Set Volume Permissions
After running docker compose up for the first time, we need to run the following command so that the rundeck user within the rundeck container can write to the node-definitions we created in a volume:
sudo chown 1000:1000 node-definitions
Optional - Configure Nginx Reverse Proxy
It is an extremely good idea to implement a reverse proxy with SSL termination. This way you can ensure there is an encrypted connection to your infrastructure, but you only have to manage SSL certificates on your proxy, rather than having to set up something in Rundeck. The alternative would be to set up Traefik.
Assuming that you have set up an Nginx reverse proxy. The configuration below is what you would need:
server {
    listen 80;
    server_name rundeck.mydomain.com;
    access_log  /var/log/nginx/access.log;
    return 302 https://rundeck.mydomain.com$request_uri;
}

server {
    listen 443 ssl;
    server_name rundeck.mydomain.com;

    access_log  /var/log/nginx/access.log;
    error_log   /var/log/nginx/error.log;

    ssl_certificate      /etc/nginx/ssl/rundeck.mydomain.com/site.crt;
    ssl_certificate_key  /etc/nginx/ssl/rundeck.mydomain.com/private.pem;

    ssl_protocols        TLSv1.2 TLSv1.3;
    ssl_ciphers RC4:HIGH:!aNULL:!MD5;
    ssl_prefer_server_ciphers on;
    keepalive_timeout    60;
    ssl_session_cache    shared:SSL:10m;
    ssl_session_timeout  10m;

    location / {
        proxy_pass      http://192.168.xxx.yyy:4440/;
        include         /etc/nginx/proxy.conf;
    }
}
rundeck.mydomain.com to whatever your FQDN for Rundeck is. Also change 192.168.xxx.yyy to whatever the internal IP is of your Rundeck server, and check the SSL certificate paths.
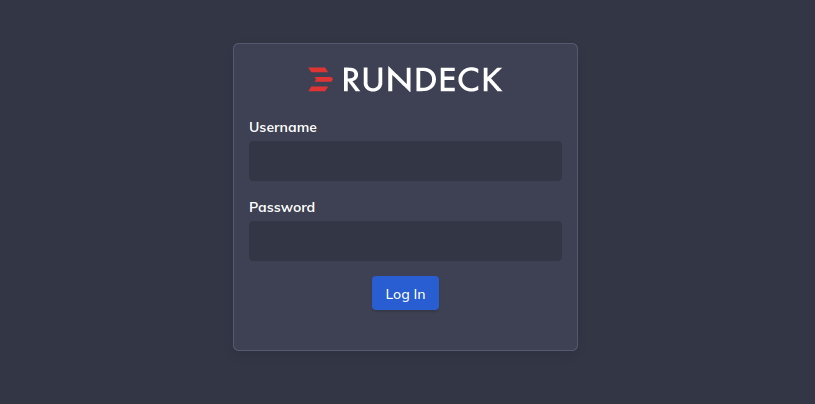
Login
If you configured a reverse proxy as shown above, then you should now be able to access Rundeck on the domain you specified in the proxy. If not, then you will need to go to the IP address or domain of the server (which might just be localhost), and with port 4440. For example: http://127.0.0.1:4440.
You will be shown a login screen. You can login with the admin user and the password you specified earlier when creating the user authentication file.
Once you have logged in successfully, you should see the dashboard like so:

That's it! You now have a fully deployed Rundeck server. I will cover how to use Rundeck in future tutorials.
Administration
Encrypted User Passwords
If you want to add another user, one simply needs to add another line for the user in the user logins file we created earlier. However, we probably want to use encrypted passwords. We can do this by running the following command:
docker exec -it rundeck java -jar /home/rundeck/rundeck.war --encryptpwd Jetty
This will prompt us to enter a username and "text to encrypt" (password). The following is an example of me creating a foo user with password bar:

We can then use any of those lines, as the password entry for the credentials file. E.g. in the screenshot below, we have used the BCRYPT option:

BCRYPT option and none of the others.
Unfortunately, after each time you change the user credentials file, you need to restart Rundeck for the changes to take effect.
docker restart rundeck
References
- Rundeck Docks - Using Postgres as a database backend
- Github - rundeck/docker-zoo - postgres
- Rundeck Docs - Authenticating Users - PropertyFileLoginModule
First published: 20th February 2023