Using Pipes In OPNsense To Pevent WAN Hogs
Introduction
Over the years, I have often experienced the issue of working in an office that only has a 70 megabit or slower internet connection, that is shared across the entire office. This meant that a single user could easily end up using the entire internet connection and making life difficult for the rest of the office. Common examples would be when they come back from holiday and download a large number of Windows updates, or a new starter joins the organization, and starts syncing down entire document share from OneDrive, Dropbox, or Seafile. Another common scenario is that someone adds a large file, such as a video, to a cloud service, which quickly causes issues because the upload speed is only a fraction of the download speed.
Wouldn't it be great if we could set up some IT infrastructure so that no single user could hog the entire internet bandwidth, so that there is generally some left over for the rest of the office to operate within? One only needs a little bit of bandwidth for tasks such as sending emails, and joining Teams/VoIP meetings. This tutorial will show you how to do just that with OPNsense through the setting up of traffic shaping pipes.
Diagram
Below is a diagram to help get across the principal of what we are going to set up.

For this tutorial, we are setting up 1 megabit restricted pipes, but you could set whatever speed you like. Also, the 70 megabit WAN connection is just an example. I have no idea what your actual internet speed is, but it is important that the pipes are smaller than the max WAN connection speed, otherwise setting up the pipes is pointless.
Steps
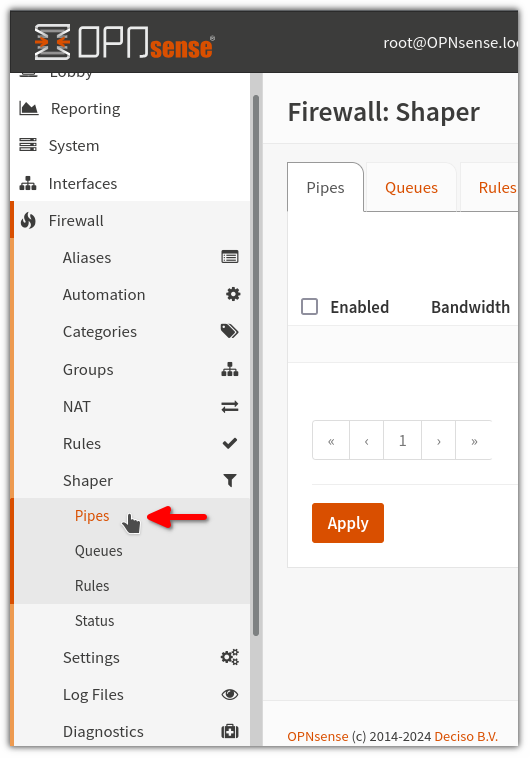
Once logged into your OPNsense web control panel, navigate to Firewall > Pipes in the panel on the left.
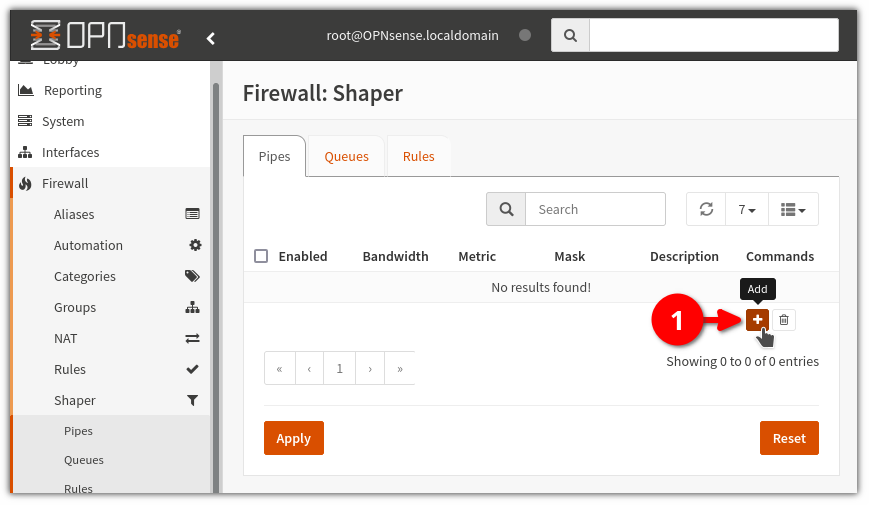
Click the Add button as indicated below, in order to create a new pipe.
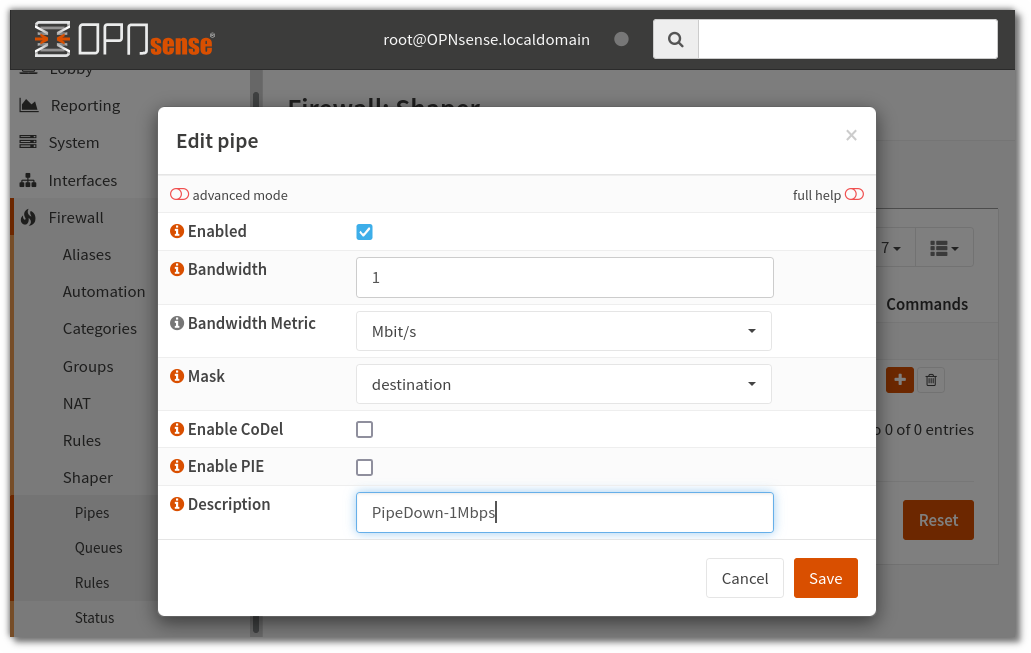
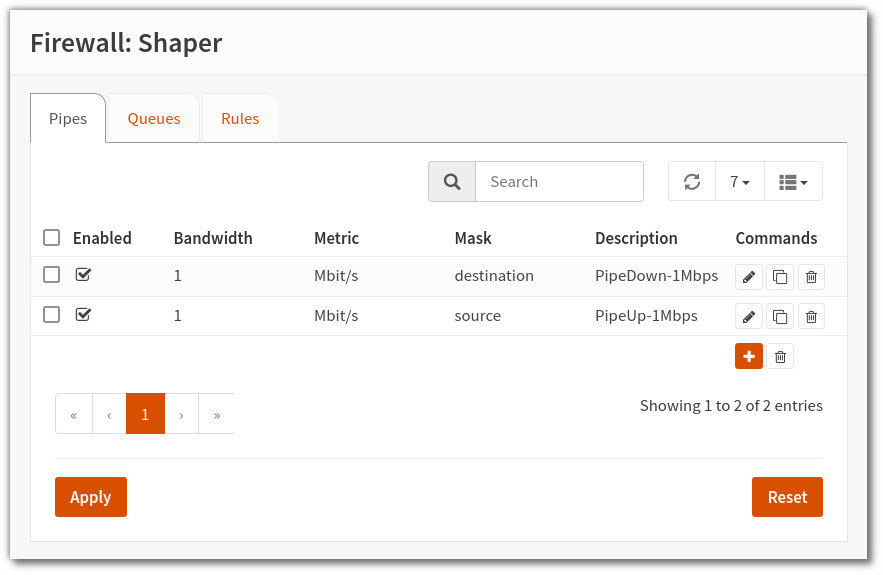
In the popup modal, set the restricted bandwidth limit that you want to apply. In this case, I am setting it to just 1 megabit for demonstration/testing purposes. Set the mask to destination, and give it a name to indicate that it is a "down" pipe for restricting download speeds form the internet.
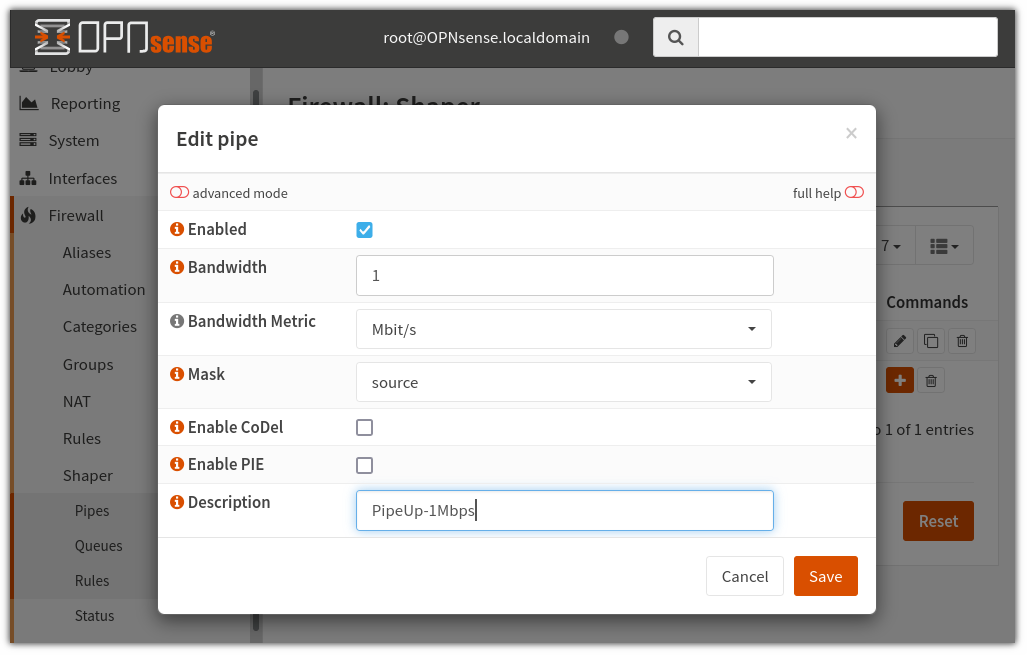
Now do the same, but this time set the mask to source and give it a name that indicates that this is an "up" pipe for restricting the upload speed.
You should now see your two pipes on the pipes tab.
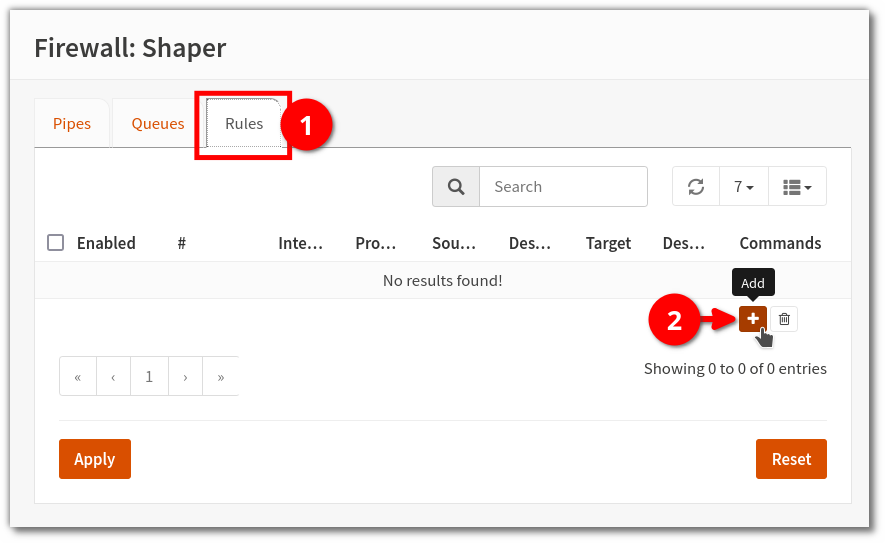
Click on the Rules tab (1) as shown below, and then click Add (2)
In the popup modal, lets create a rule that applies the restricted download pipe to any traffic that is coming down to our local IPs. Hence the source is any but the destination is our internal network CIDR.
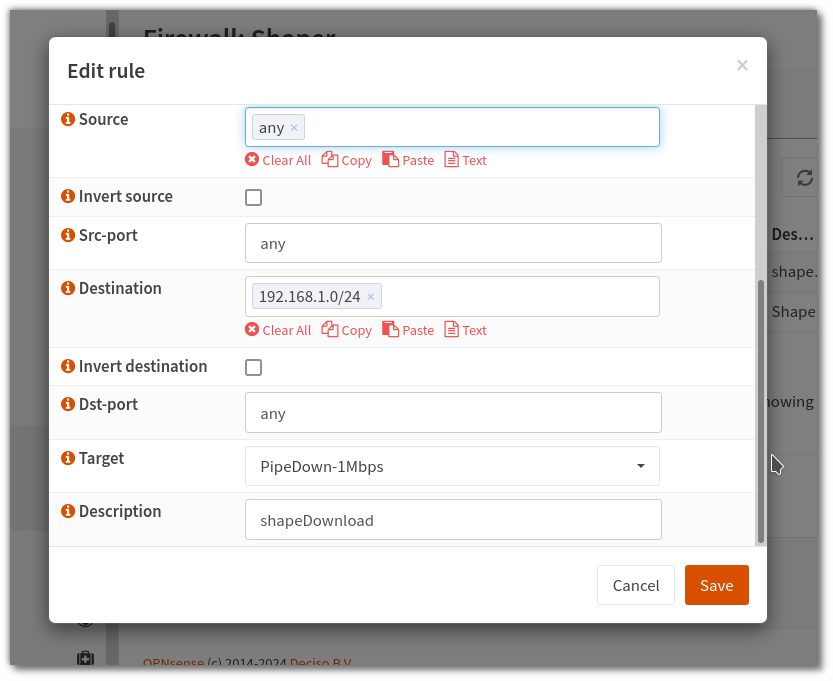
/32 instead.
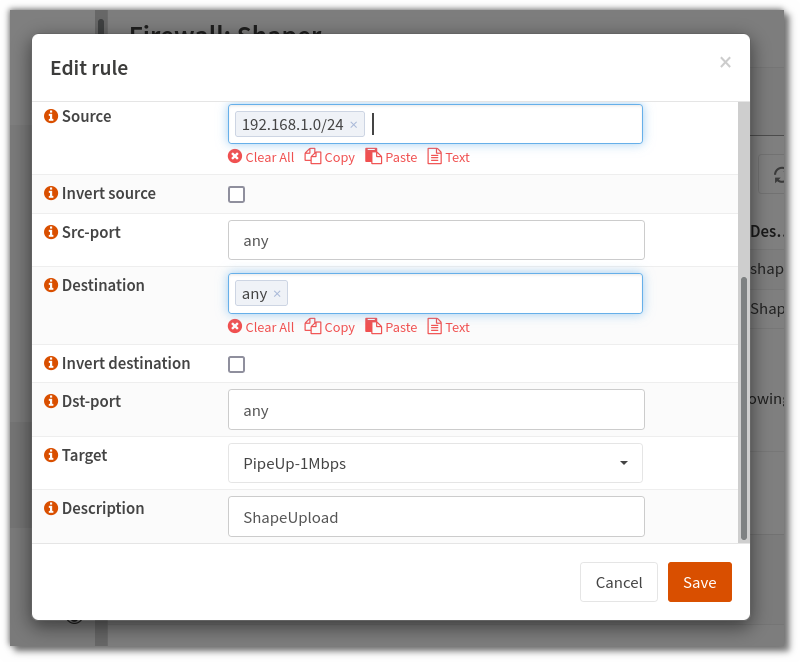
Now do the same for applying the "up" pipe to the upload speed of the hosts. Thus, we are now setting the source to the local network subnet, instead of the destination.
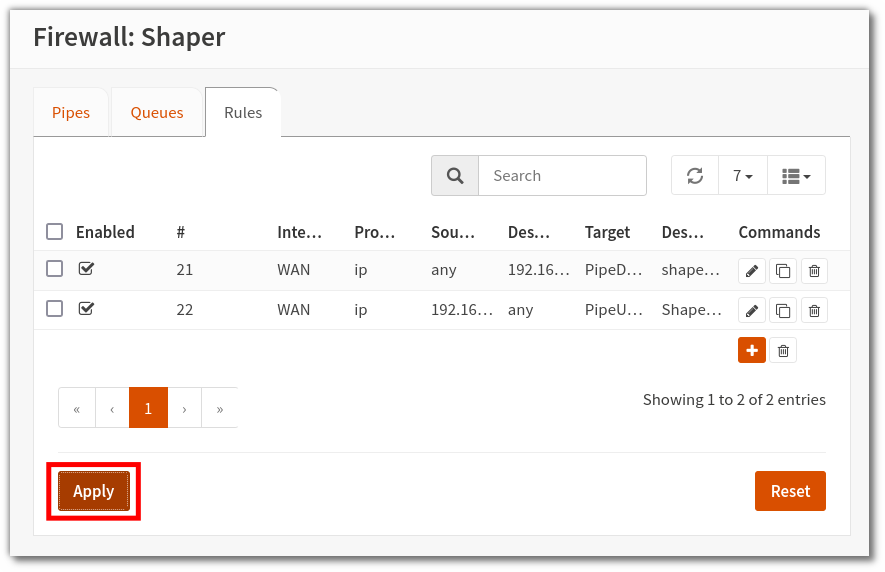
After having added both rules, you should see them on the overview page like so. Click Apply.
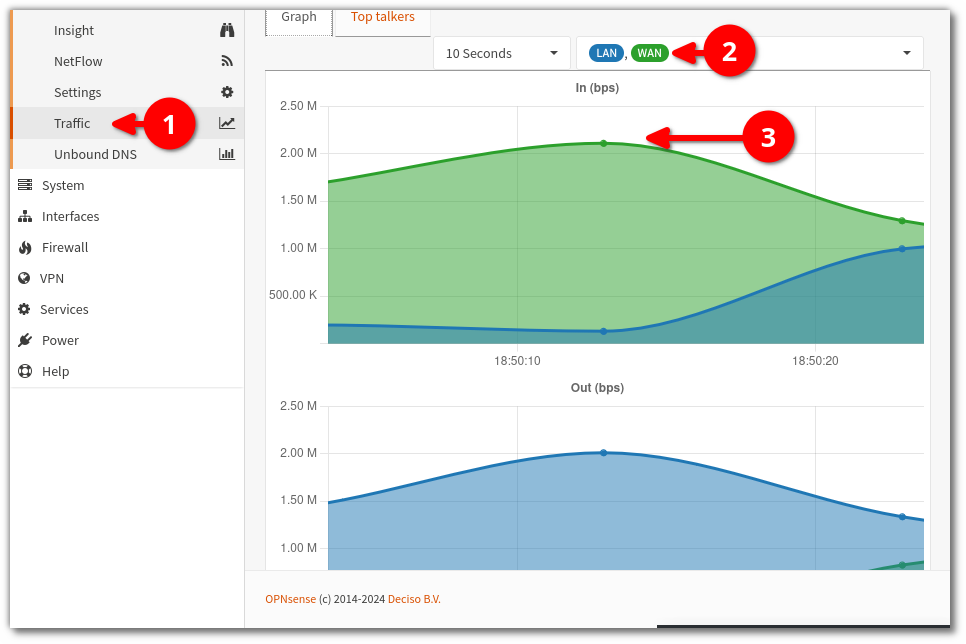
At this point, it is a good idea to test that this is working. I set my phone to watch a youtube video, and ran a speed test on one of the computers. The speed test came back with just 1 megabit (the restricted speed of my pipe), and the total bandwidth showed 2 megabit, clearly showing that both my computer and the phone each got up to 1 megabit (it wasn't shared/split).
Taking It Further
At this point, I wanted to take this further and add exceptions for specific hosts to have full access to the WAN. This way hosts are generally restricted to prevent them using a lot of the internet, but certain hosts, like a home server or work machine, can have full speed.
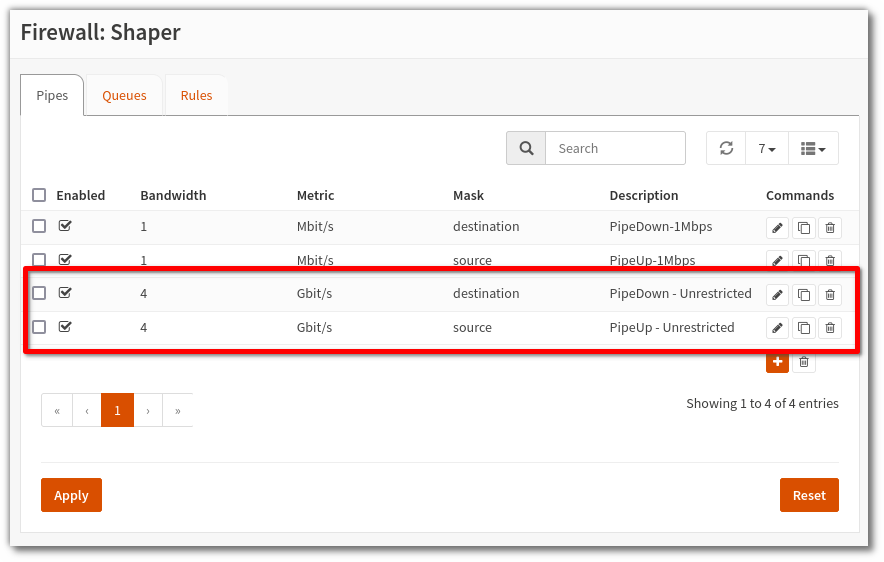
To do this, I created two more pipes for the "unrestricted" speed.
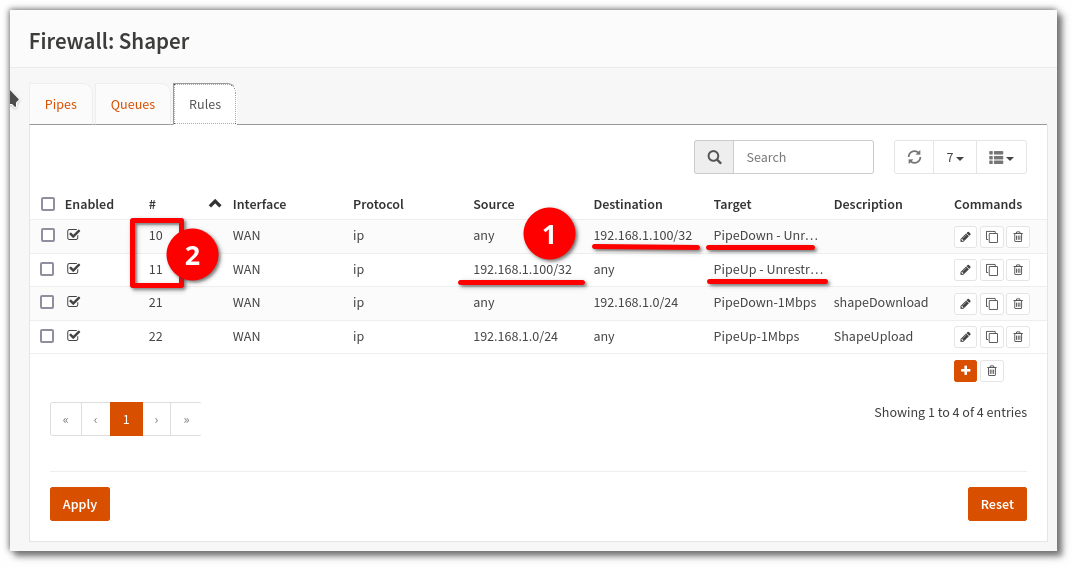
Then one needs to create a down and up rule for each host or subnet, which applies this pipe to them (1). It is very important that the "exception" rules are applied before the generic restriction rules (2). E.g they have a lower number. The generic restriction rules should always be last (highest number).
First published: 4th November 2024
