Proxmox Storage Guide
Table Of Contents
Related Posts
Proxmox Default Storage Setup
Proxmox's default setup is to create an LVM volume group called pve.
It will then create a thin-pool called data on that volume group, as well as a normal ("thick") logical volume called root on there for your root filesystem (/).
A storage configuration called local-lvm is then configured to use the data thin pool, which your KVM guests will be set to utilize.
Since the guests are making use of a thin pool, rather than a traditional "thick" logical volume, the guest's can be snapshotted. However, the thin pool can run out of storage and you could lose all of them. This also means that the root filesystem is quite small, and whilst some space will be available on the volume group for the possible expansion of the root filesystem's LVM, this will require the system to be taken offline and booted with something like a rescue disk, so that you can perform the resize of the filesystem (not the LVM). Some people decide to completely remove the thin pool from the root disk, and expand the root filesystem to take up all of the space. This would still allow you be able to use it for guests if you wished, through setting up directory storage configurations that store qcow2/raw guest disk images.
Storage Configurations
Whenever looking at a virtual machine and seeing where it's disk is located, you will always be shown the storage configuration that it is using, rather than something like the name of a disk. Likewise, when you configure a new VM, or create a backup routine, you sill need to specify the storage configuration, rather than a disk.
View Existing Storage Configurations
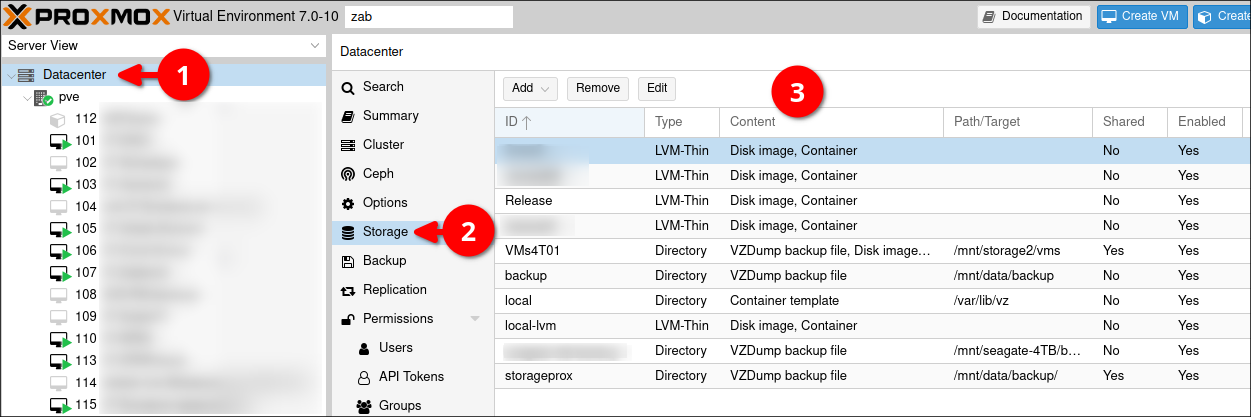
You can view and create your storage configurations by going to the Datacenter (1), and clicking on Storage (2). Here you will see a table of information about all of your storage configurations (3).
Config File
If you prefer to use the config file, or need to edit storage through the CLI for whatever reason, all storage configuration is held within a single configuration file at: /etc/pve/storage.cfg. More information about the configuration file and CLI commands can be viewed at Proxmox Wiki - Storage.
LVM
Volume Groups
Volume groups are a collection of physical volumes that can be used to hold logical volumes. This is quite nice, because it actually allows one to attach additional disks, and grow to make use of them, without any downtime. Additionally, if one runs the relevant set of commands (LVM cheatsheet), one can essentially move the volume group from one disk to another. This is useful if you only have so many drive slots, and you want to expand by just utilizing a larger disk, rather than more disks.
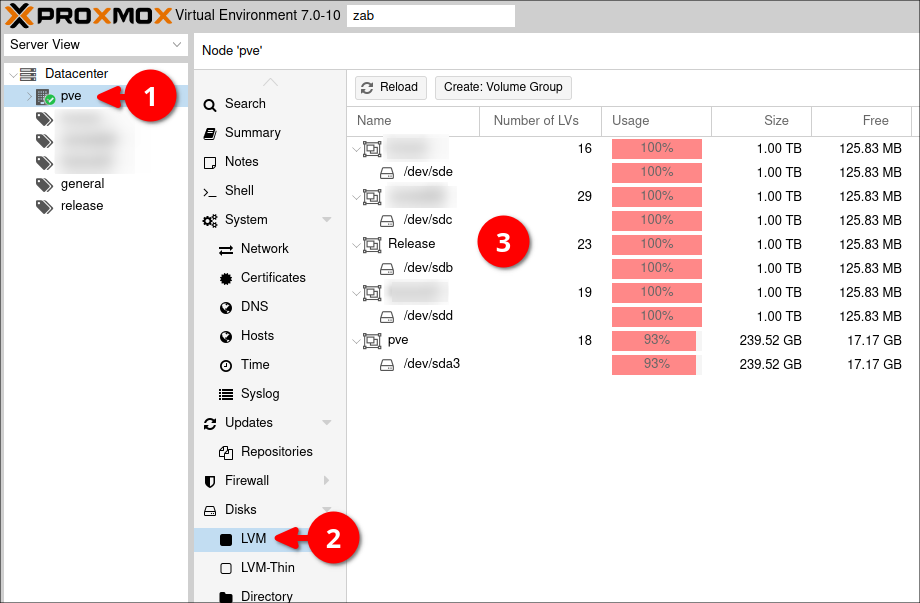
View Volume Groups
To view the LVM volume groups on your Proxmox server, navigate to
Volume Groups Are "Safe"
Unlike thin-pools and filesystems, volume groups will never unexpectedly run out of space due to things "growing". This is because when one creates a logical volume (even a thin-pool), its size is always defined at the point of creation and will only be created if it fits within the volume group. It is only the LVM thin pools, and the guest filesystems that can unexpectedly run out of space as more files/data are written.
Thin Pools
Proxmox likes to make use of LVM thin provisioning by default as it allows you make efficient use of your storage drives through over-provisioning. For example, one might have a single 500 GB SSD in a server. One might then provision 100 guests, each with 20GB filesystem. This would be a total allocation of 2,000 GB when you only have 500 GB. With thin-provisioning, the server would be able to do this, because each of the guests is only actually utilizing a few GB of storage, with most of the filesystem being empty. However, this carries danger as you might imagine.
View Thin Pools
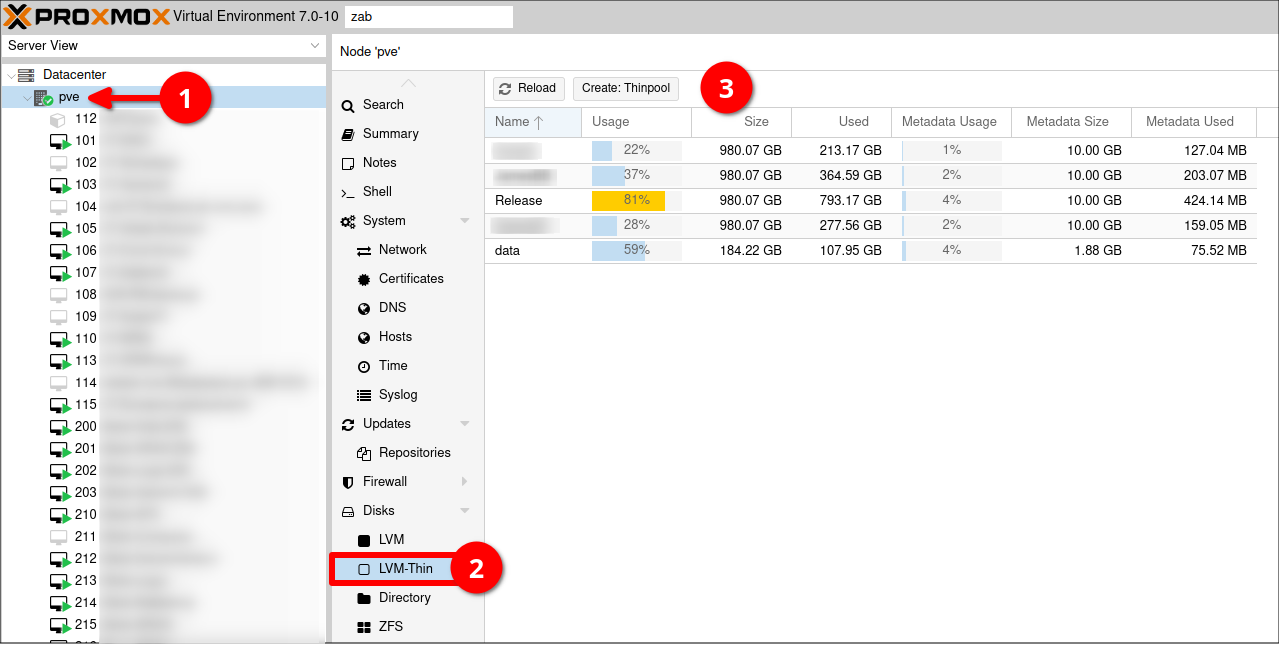
To check your LVM thin pool(s) in Proxmox, select the server in question before selecting LVM-Thin and you will see a table of thin pools.
Thin Pools Carry Danger!
Thin pools are dangerous because they are a set allocated size, and are usually over-allocated to the guests, but this is also the main reason why they are useful. This means as the guests write more and more data, the thin-pool can run out of space, causing issues for all of the related guests. I have never experienced/tested what happens when this happens, but the best-case scenario would be that the underlying guests fail to write as the disks become read-only. The worst case would be that all the data gets dropped/corrupted and you lose everything. Thus, keep monitoring your thin-pools and take action whenever they reach 80%.
LVM Snapshots
Due to how LVM snapshots grow in size (refer here), Proxmox only supports snapshots on guests that make use of thin pools and not those that use "thick" logical volumes. This allows the snapshot to not be a defined size at the point of creation, and grow as needs require.
When a snapshot is created on a thinly-provisioned guest, if you choose to save the memory state, two logical volumes are created. One for the memory state and one for the underlying filesystem as mentioned here.
View Disks
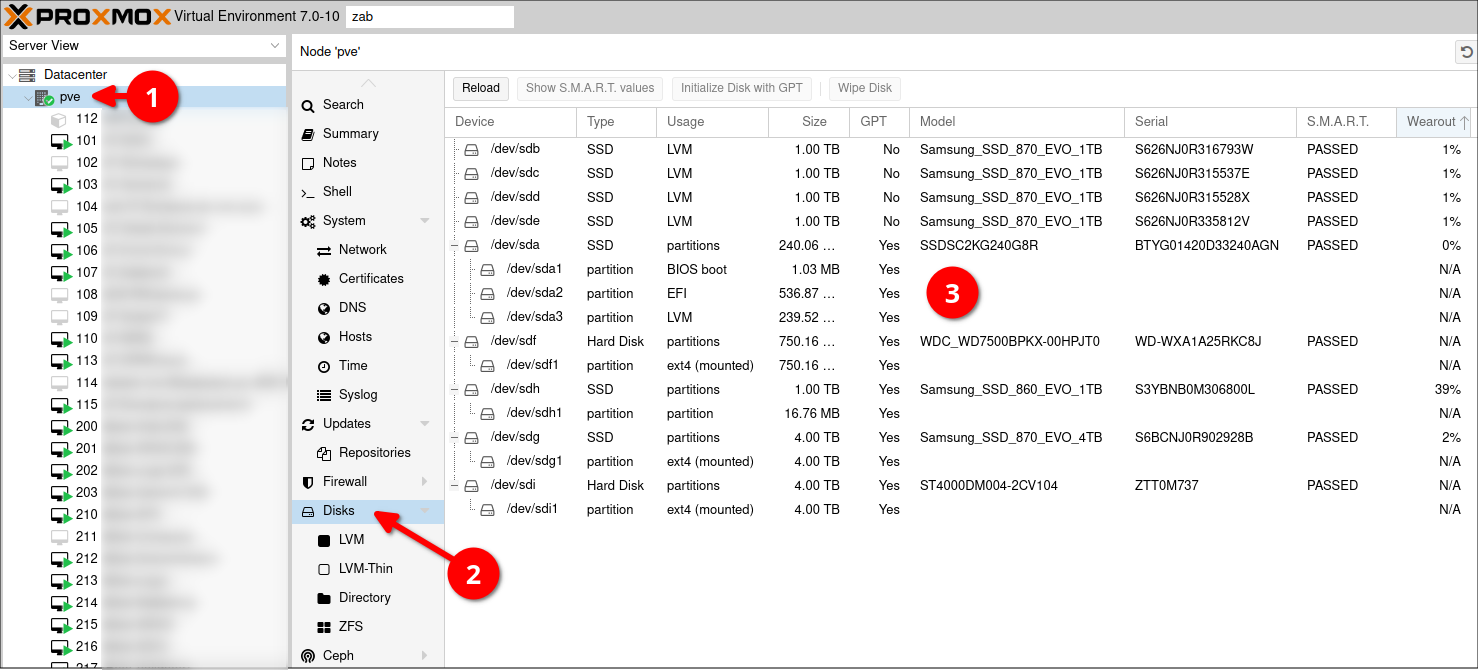
Proxmox provides the ability to view the disks/partitions attached to the server, with lots of useful information. This area is mostly useful for monitoring the disk's health by looking at the S.M.A.R.T. status, as well as the Wearout level which is particularly for SSDs that can only be written to so many times. This is a good area to check every now and then to make sure your disk drives aren't about to fail.
To view the disks, select the server (1), and select Disks (2). You will then see a table of information about your disks (3).
View Guest Storage
To view a guest's storage location, select the guest (1), click on Hardware (2), and look at the Hard Disk table row (3), and you will see the name of the storage configuration that the disk utilizes.
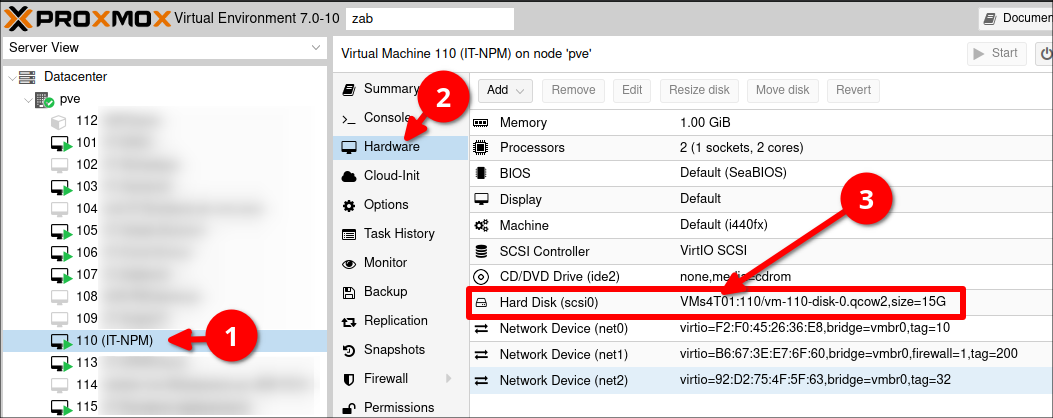
Unfortunately, you will have to work backwards from the Storage configuration to find out which physical disk, or volume group this storage configuration actually utilizes.
First published: 23rd March 2023