Proxmox - Generate Let's Encrypt Certs Using DigitalOcean DNS Challenge
This tutorial will show you how to configure Proxmox to generate Let's Encrypt TLS certificates automatically using DigitalOcean DNS challenges. This does require you to be managing your domain's DNS records through DigtialOcean, which is free and easy to do. These are also the same steps you would perform if your domain is managed with other DNS providers such as AWS Route53 or Cloudflare instead, with just needing to select the alternative challenge plugin, and the other relevant steps for generating the API key.
Why DNS Challenge?
One will need to use a DNS challenge, rather than the simpler HTTP challenge route for generating TLS certificates if your Proxmox server is behind a NAT, and thus cannot be reached by Let's Encrypt's servers as part of the verification process.
Related Posts
- Proxmox - Configure Automated Let's Encrypt Certificates Using HTTP Challenges
- Proxmox - Use Custom SSL/TLS Certificates
Steps
Generate DigitalOcean API Key
The first thing we need to do is generate an API key in DigitalOcean, that our Proxmox server can utilize for manipulating DNS records, in order to perform the DNS challenge that Let's Encrypt gives us later.
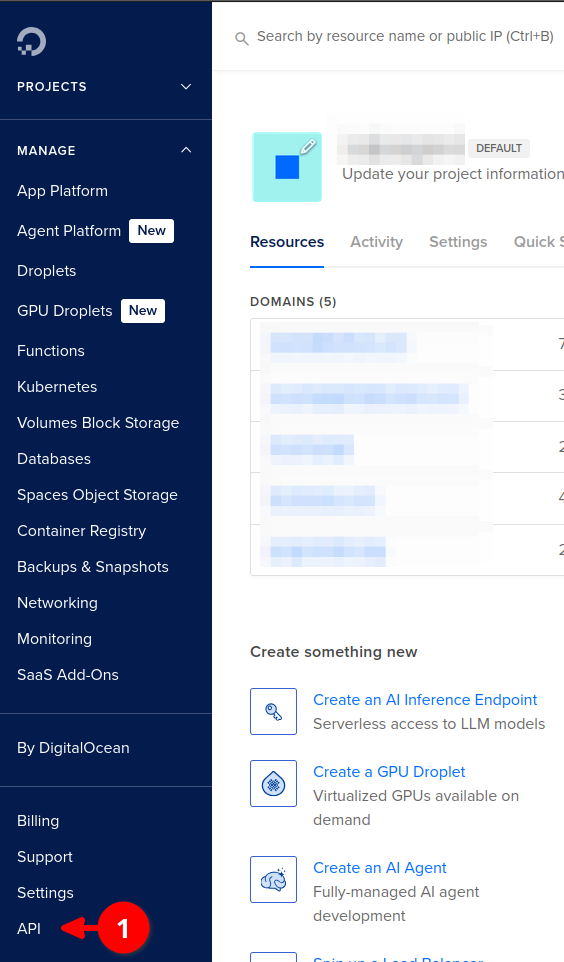
Log into DigitalOcean and click API in the side panel.
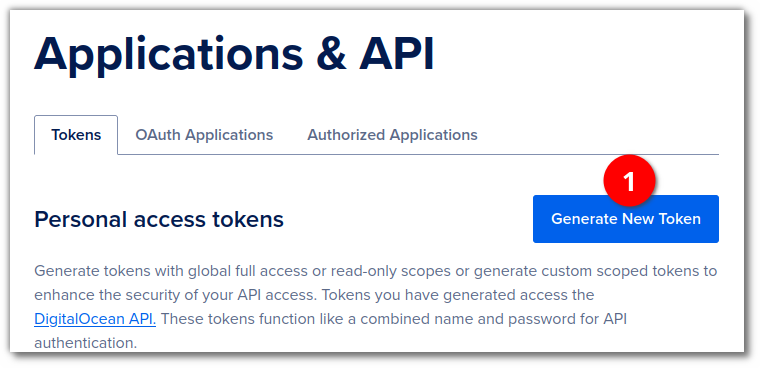
Click the button to Generate New Token.
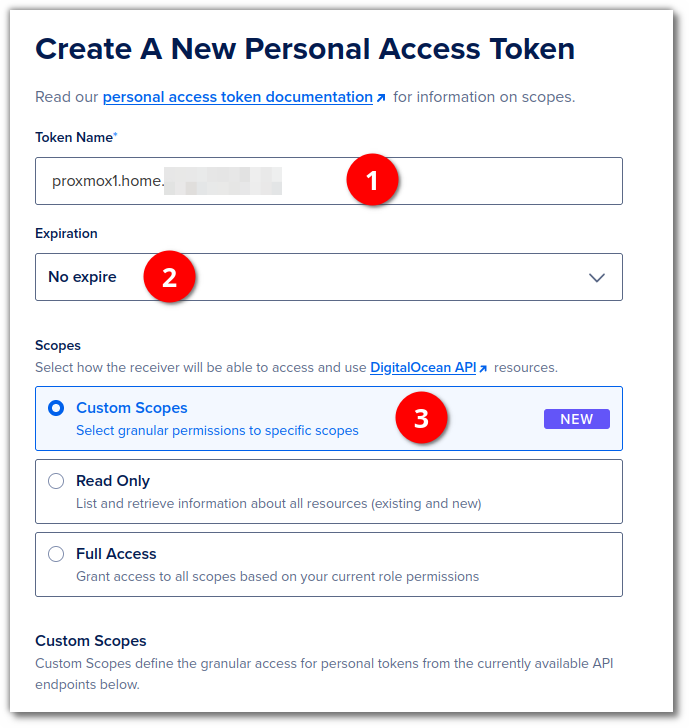
Give the token a name (1), set the expiry (I set to not expire, as I don't want to find out it randomly stopped working far into the future), and leave the scopes to the default to Custom Scopes, as we will select them next.
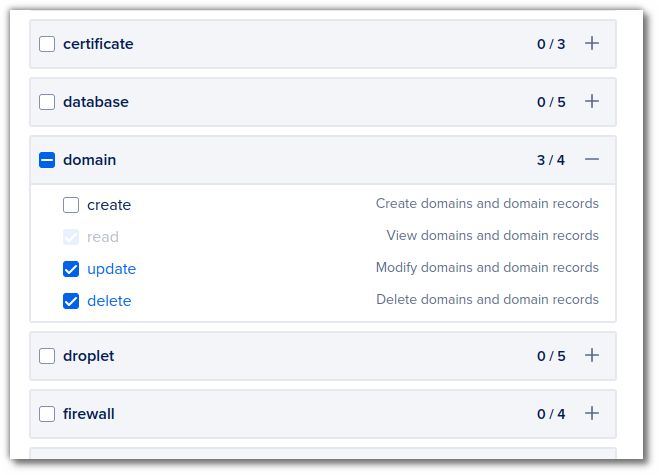
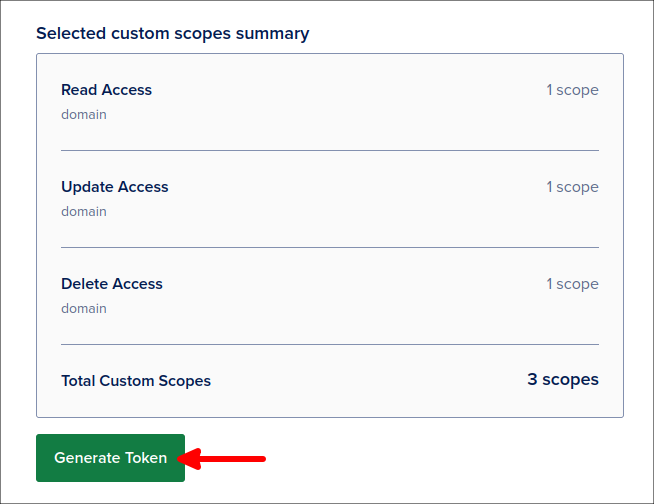
Scroll down to find the domain scope and select update and delete. Proxmox will not need to register new domains.
Scroll down and click the button to Generate Token.
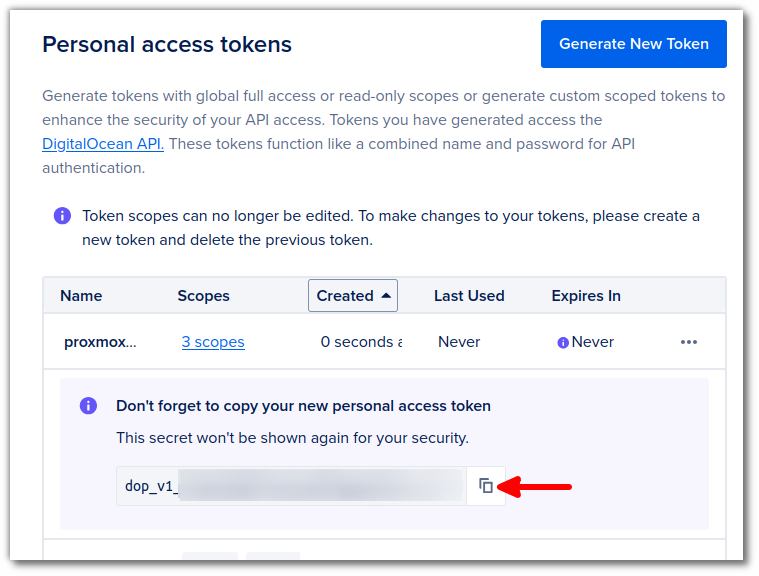
Click on the clipboard to copy the token that was just created for you.
Configuring Proxmox
Now that we have our API key, we can configure Proxmox to generate Let's Encrypt TLS certificates using DNS challenges like so.
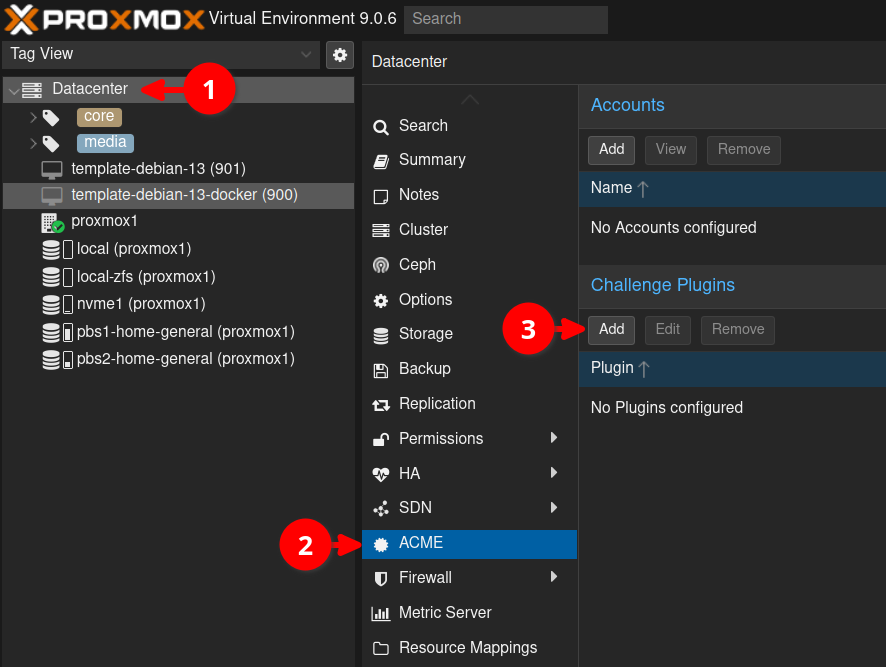
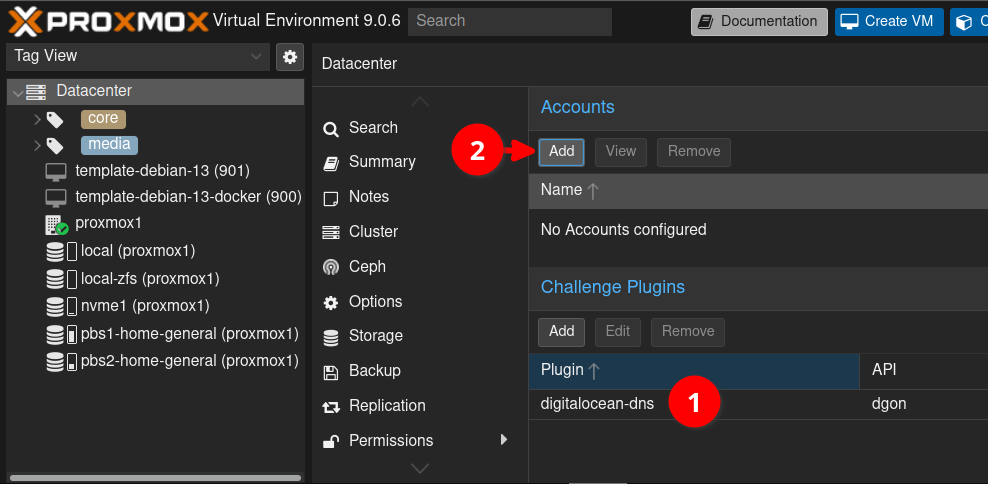
Click on Datacenter (1), then ACME (2), and click on Add (3) for adding a new challenge plugin.
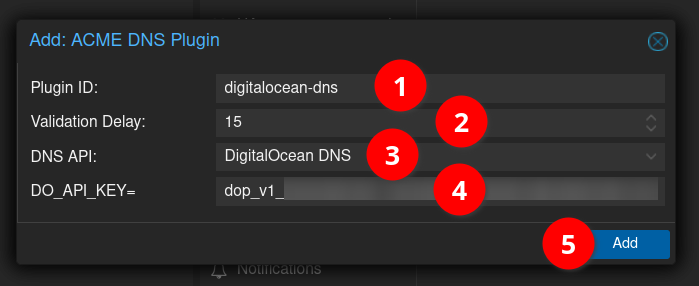
Give our new plugin a name (1), set the validation delay to 15 (safe and not too long), select DigitalOcean DNS from the dropdown (3), and paste in the key we
just created earlier (4).
- You will see the plugin you just added.
- Now click Add for creating a new Let's Encrypt account.
Enter a name for the account, and your email address.
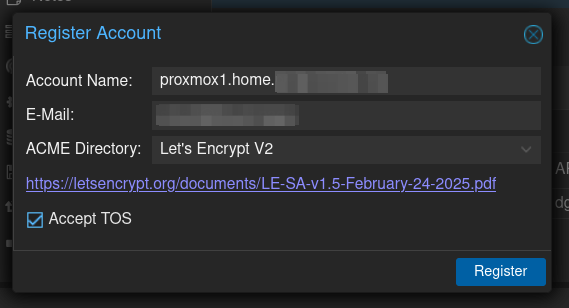
You should see the following output saying the account was created.

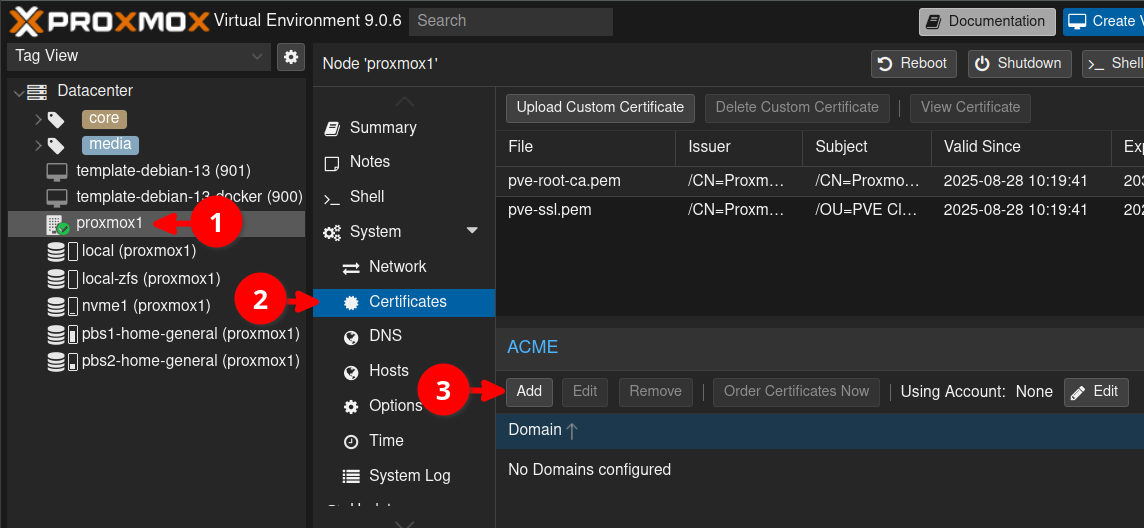
Now click on your node (1), then select Certificates (2), before clicking on *Add**.
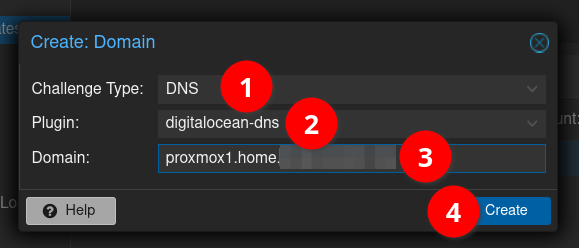
- Set the challenge type to DNS.
- Select the plugin you created earlier for DigitalOcean.
- Enter the fully qualified domain name that you access your server on. E.g. proxmox.mydomain.com.
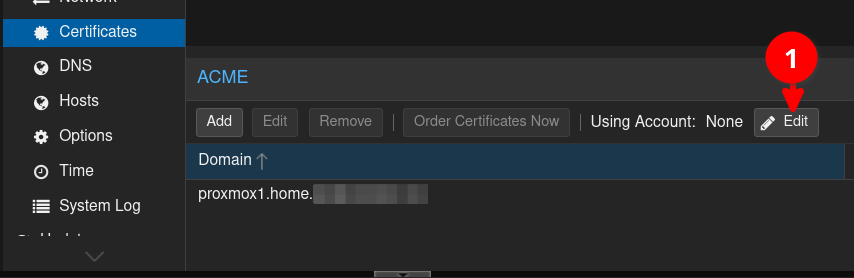
Beside Using Account click on Edit.
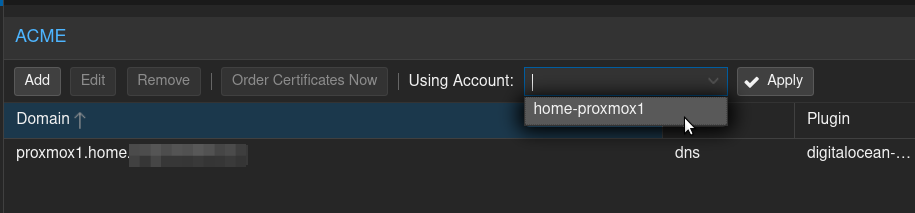
Then select the account you just created earlier from the dropdown.
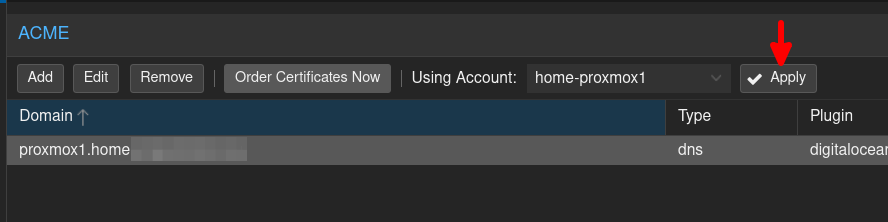
Then click Apply.
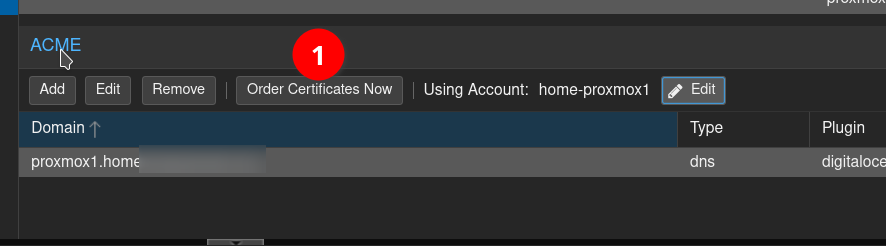
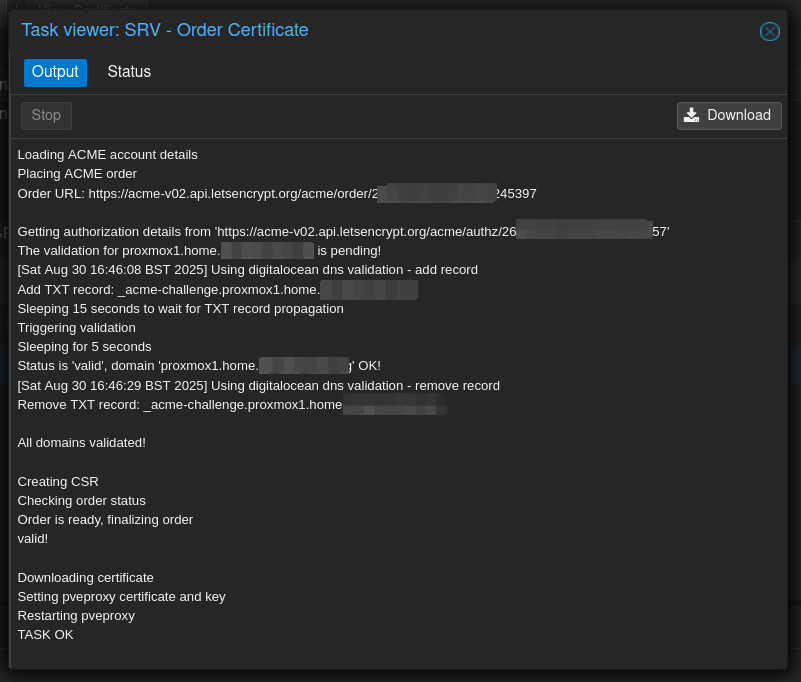
Finally, click on Order Certificates Now to request your Let's Encrypt certificates.
You should see output similar to below, before the website refreshes, and you are now using a trusted Let's Encrypt TLS certificate.
Conclusion
You should now have trusted TLS certificates for accessing your Proxmox server. These should automatically refresh in future, so that you never need to worry about performing any of these steps again in future.
First published: 31st August 2025